> ## Documentation Index
> Fetch the complete documentation index at: https://docs.fire.rest/llms.txt
> Use this file to discover all available pages before exploring further.
# Agent web tools
> Use Fire Agent's built-in web pages to check status and run print tests.
Fire Agent ships with two built-in web pages served by the agent itself (no internet needed). Use them to **check status**, **diagnose** and **run print tests** without the point-of-sale app.
Both are only reachable from the same machine where the agent runs, because it listens only on `127.0.0.1` (localhost).
| Page | Address | Purpose |
| --------------------- | ----------------------------- | ------------------------------------------------------------ |
| **Test page** | `http://localhost:9100/` | Connect, list printers and print test receipts |
| **Information panel** | `http://localhost:9100/panel` | View status, version, updates, printers and URLs (read-only) |
If you changed the port with `FIRE_AGENT_PORT`, use that number instead of `9100`.
## Prerequisites
* Fire Agent must be **installed and running** (icon visible in the system tray). If it is not, see [Windows installation](/en/manuals/fire-agent/installation).
* A supported browser: Chrome or Edge 105+, Brave, Opera or Firefox 110+. See [terminal requirements](/en/manuals/pos/hardware-requirements#browser).
* The agent **token** (`FIRE_AGENT_TOKEN`). On fresh installs the default is `fire-agent-dev-token`; in production it is the value set during installation.
Click the Fire Agent tray icon to open the information panel directly in the browser.
## Test page
The test page lets you connect to the agent and print sample receipts. It is the main tool to confirm that a printer works.
The interface has a left sidebar with four sections (Connection, Printers, Print, Log) and a **Connect / Disconnect** button in the top right.
### Open the page
Open `http://localhost:9100/` in the browser. The **Fire Agent** interface appears.
### Connection
This is the section shown when the page opens.
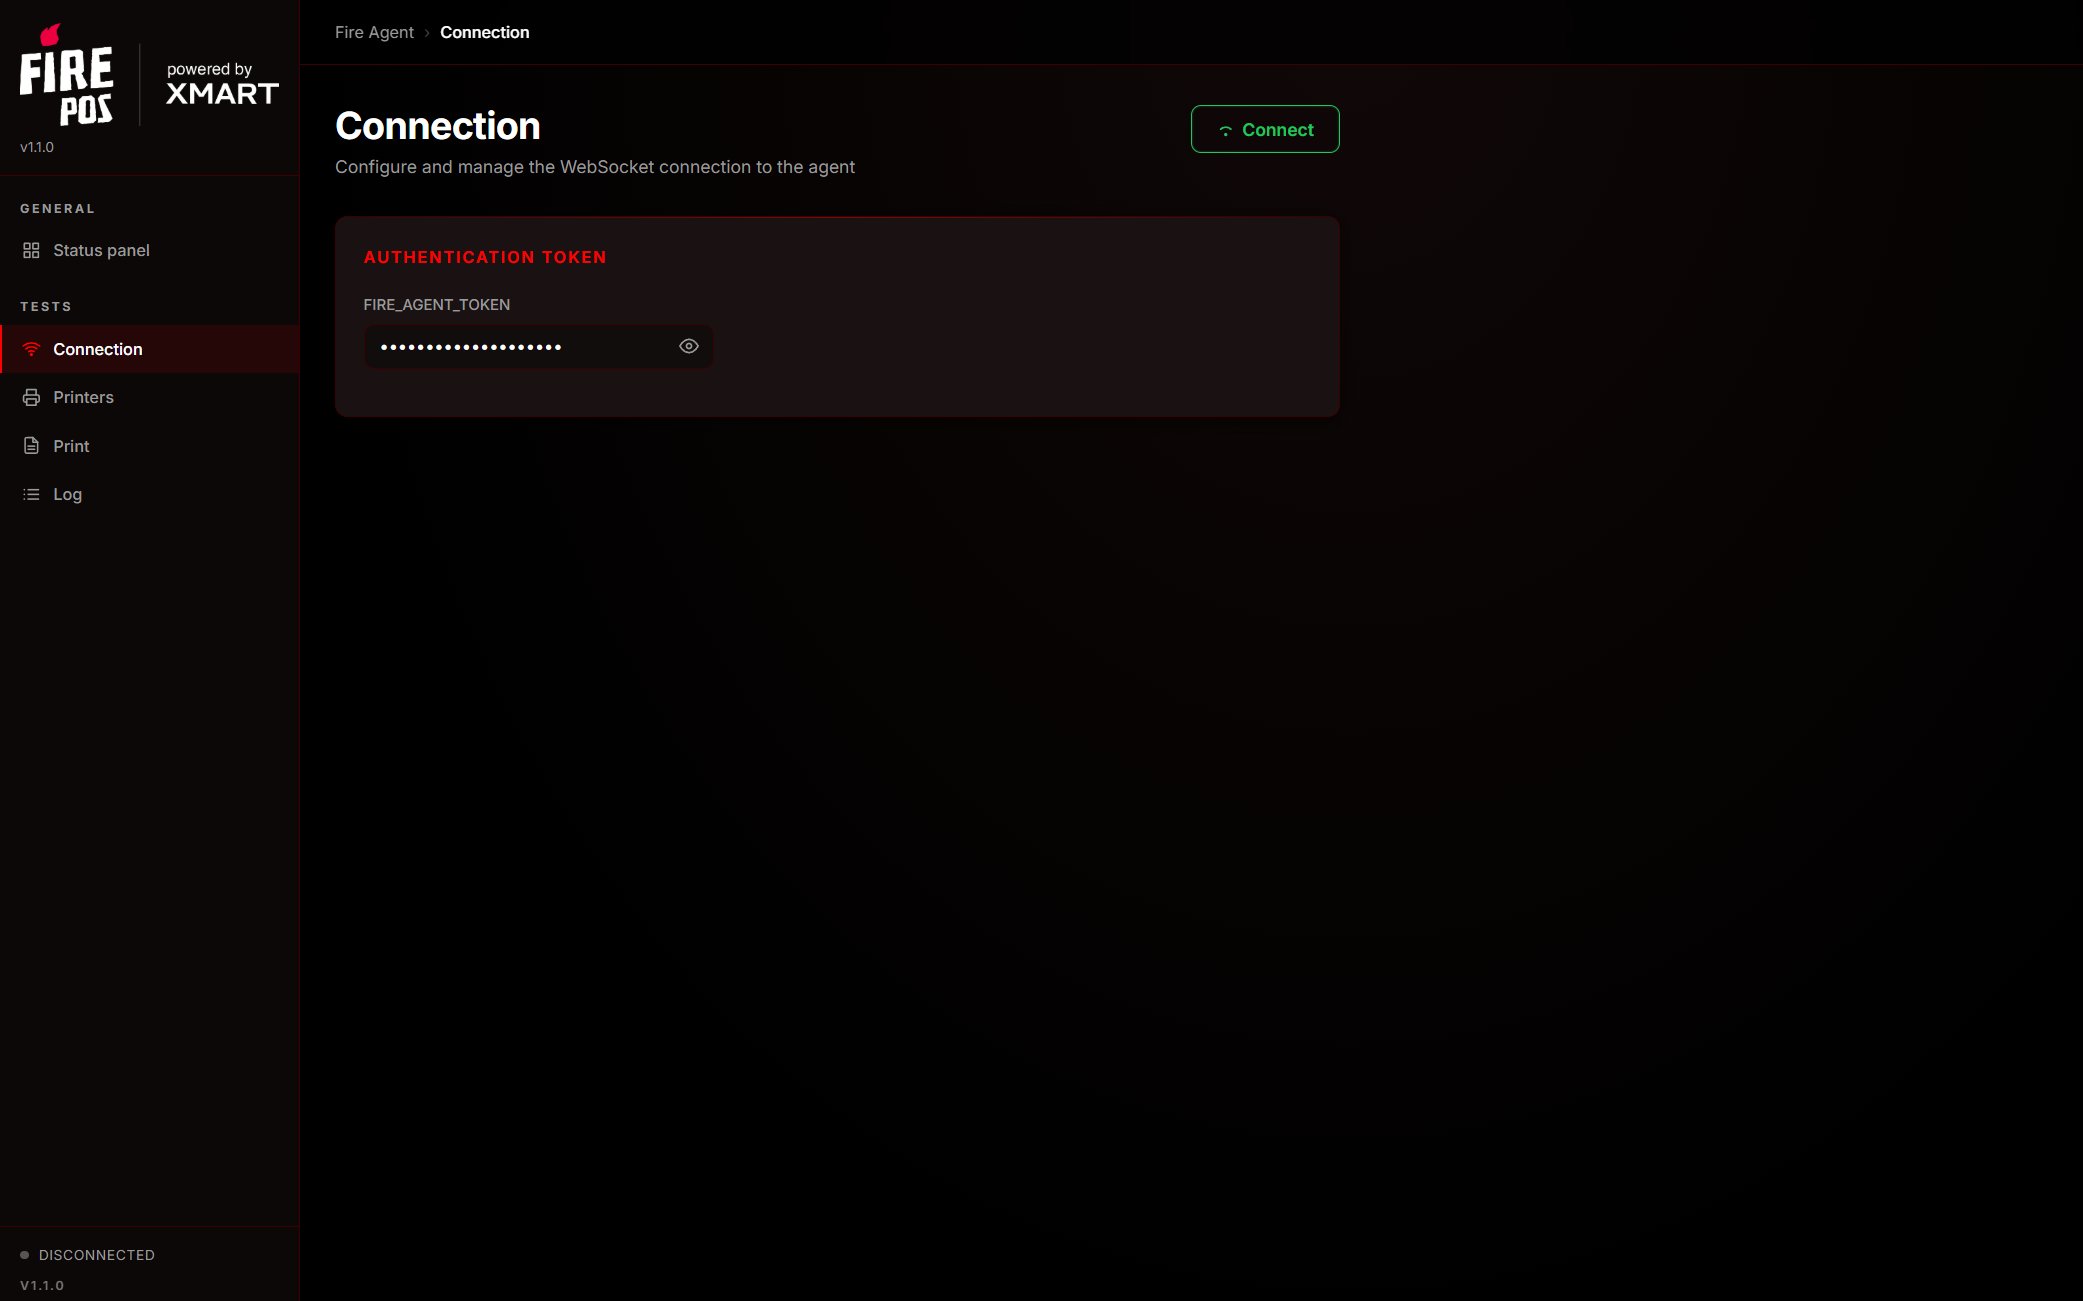 1. In the **FIRE\_AGENT\_TOKEN** field, enter the agent token. Use the **eye** icon to show or hide it.
2. Click **Connect** (top right).
3. The status indicator changes:
* **Connecting...** (yellow): establishing the connection.
* **Connected** (green): connection successful.
* **Error** (red): could not connect (check that the agent is running).
4. On a successful connection, the agent **lists the printers automatically** and the button changes to **Disconnect**.
### Printers
1. In the **FIRE\_AGENT\_TOKEN** field, enter the agent token. Use the **eye** icon to show or hide it.
2. Click **Connect** (top right).
3. The status indicator changes:
* **Connecting...** (yellow): establishing the connection.
* **Connected** (green): connection successful.
* **Error** (red): could not connect (check that the agent is running).
4. On a successful connection, the agent **lists the printers automatically** and the button changes to **Disconnect**.
### Printers
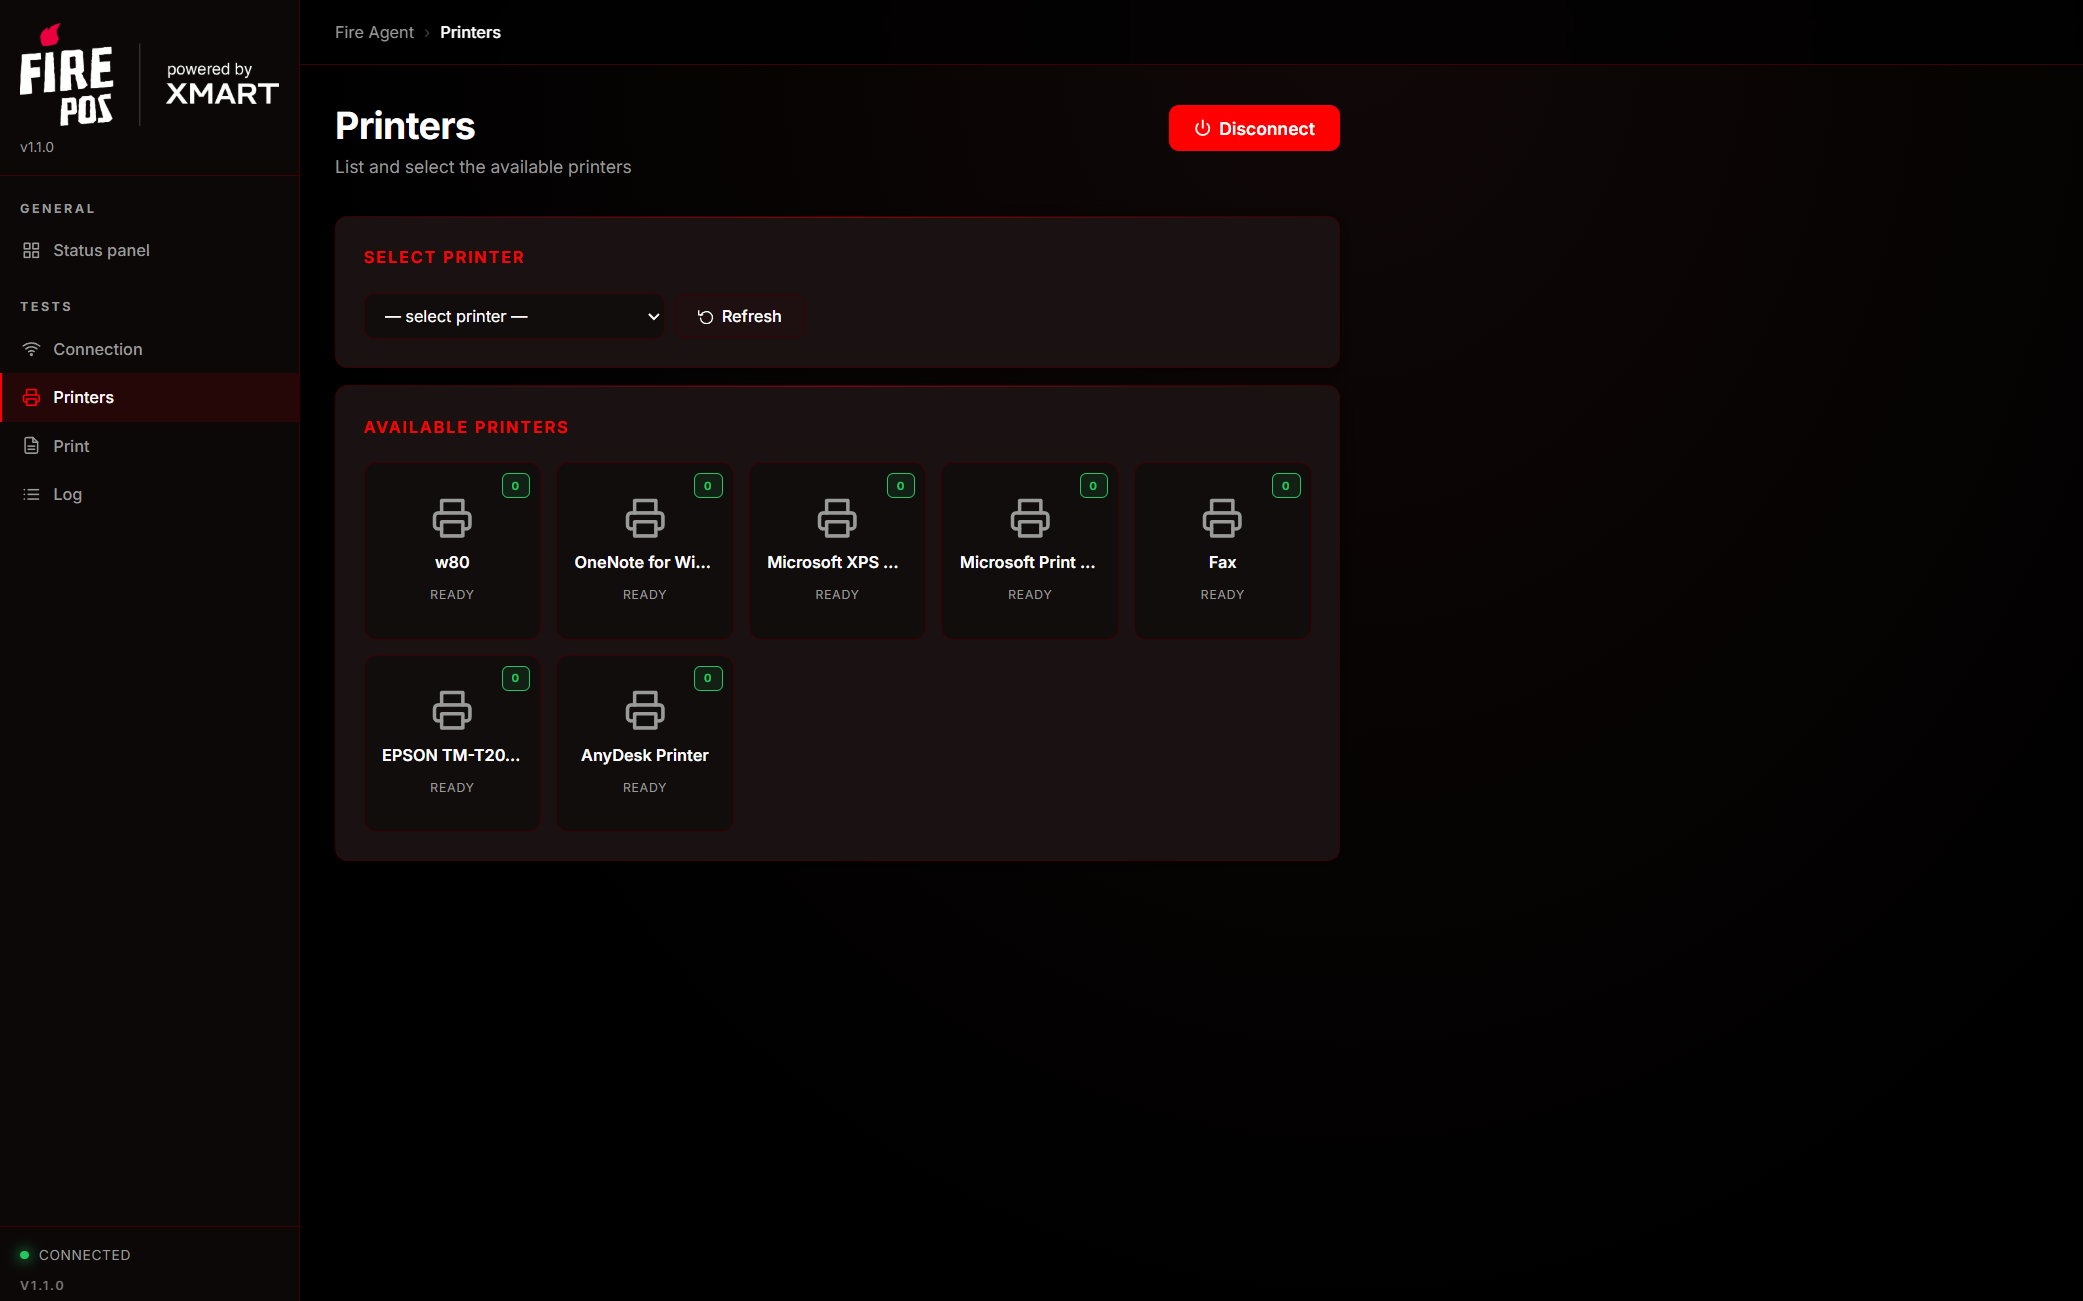 1. Click **Printers** in the sidebar.
2. You see the printers detected in Windows. The default one is marked **(default)**.
3. Select a printer in the **Select printer** dropdown. The selection is saved for next time.
4. If you connected a new printer, click **Refresh** to query them again.
If no printer appears, install its driver from Windows settings first, then click **Refresh**.
### Print
This section sends test print jobs to the selected printer.
1. Click **Printers** in the sidebar.
2. You see the printers detected in Windows. The default one is marked **(default)**.
3. Select a printer in the **Select printer** dropdown. The selection is saved for next time.
4. If you connected a new printer, click **Refresh** to query them again.
If no printer appears, install its driver from Windows settings first, then click **Refresh**.
### Print
This section sends test print jobs to the selected printer.
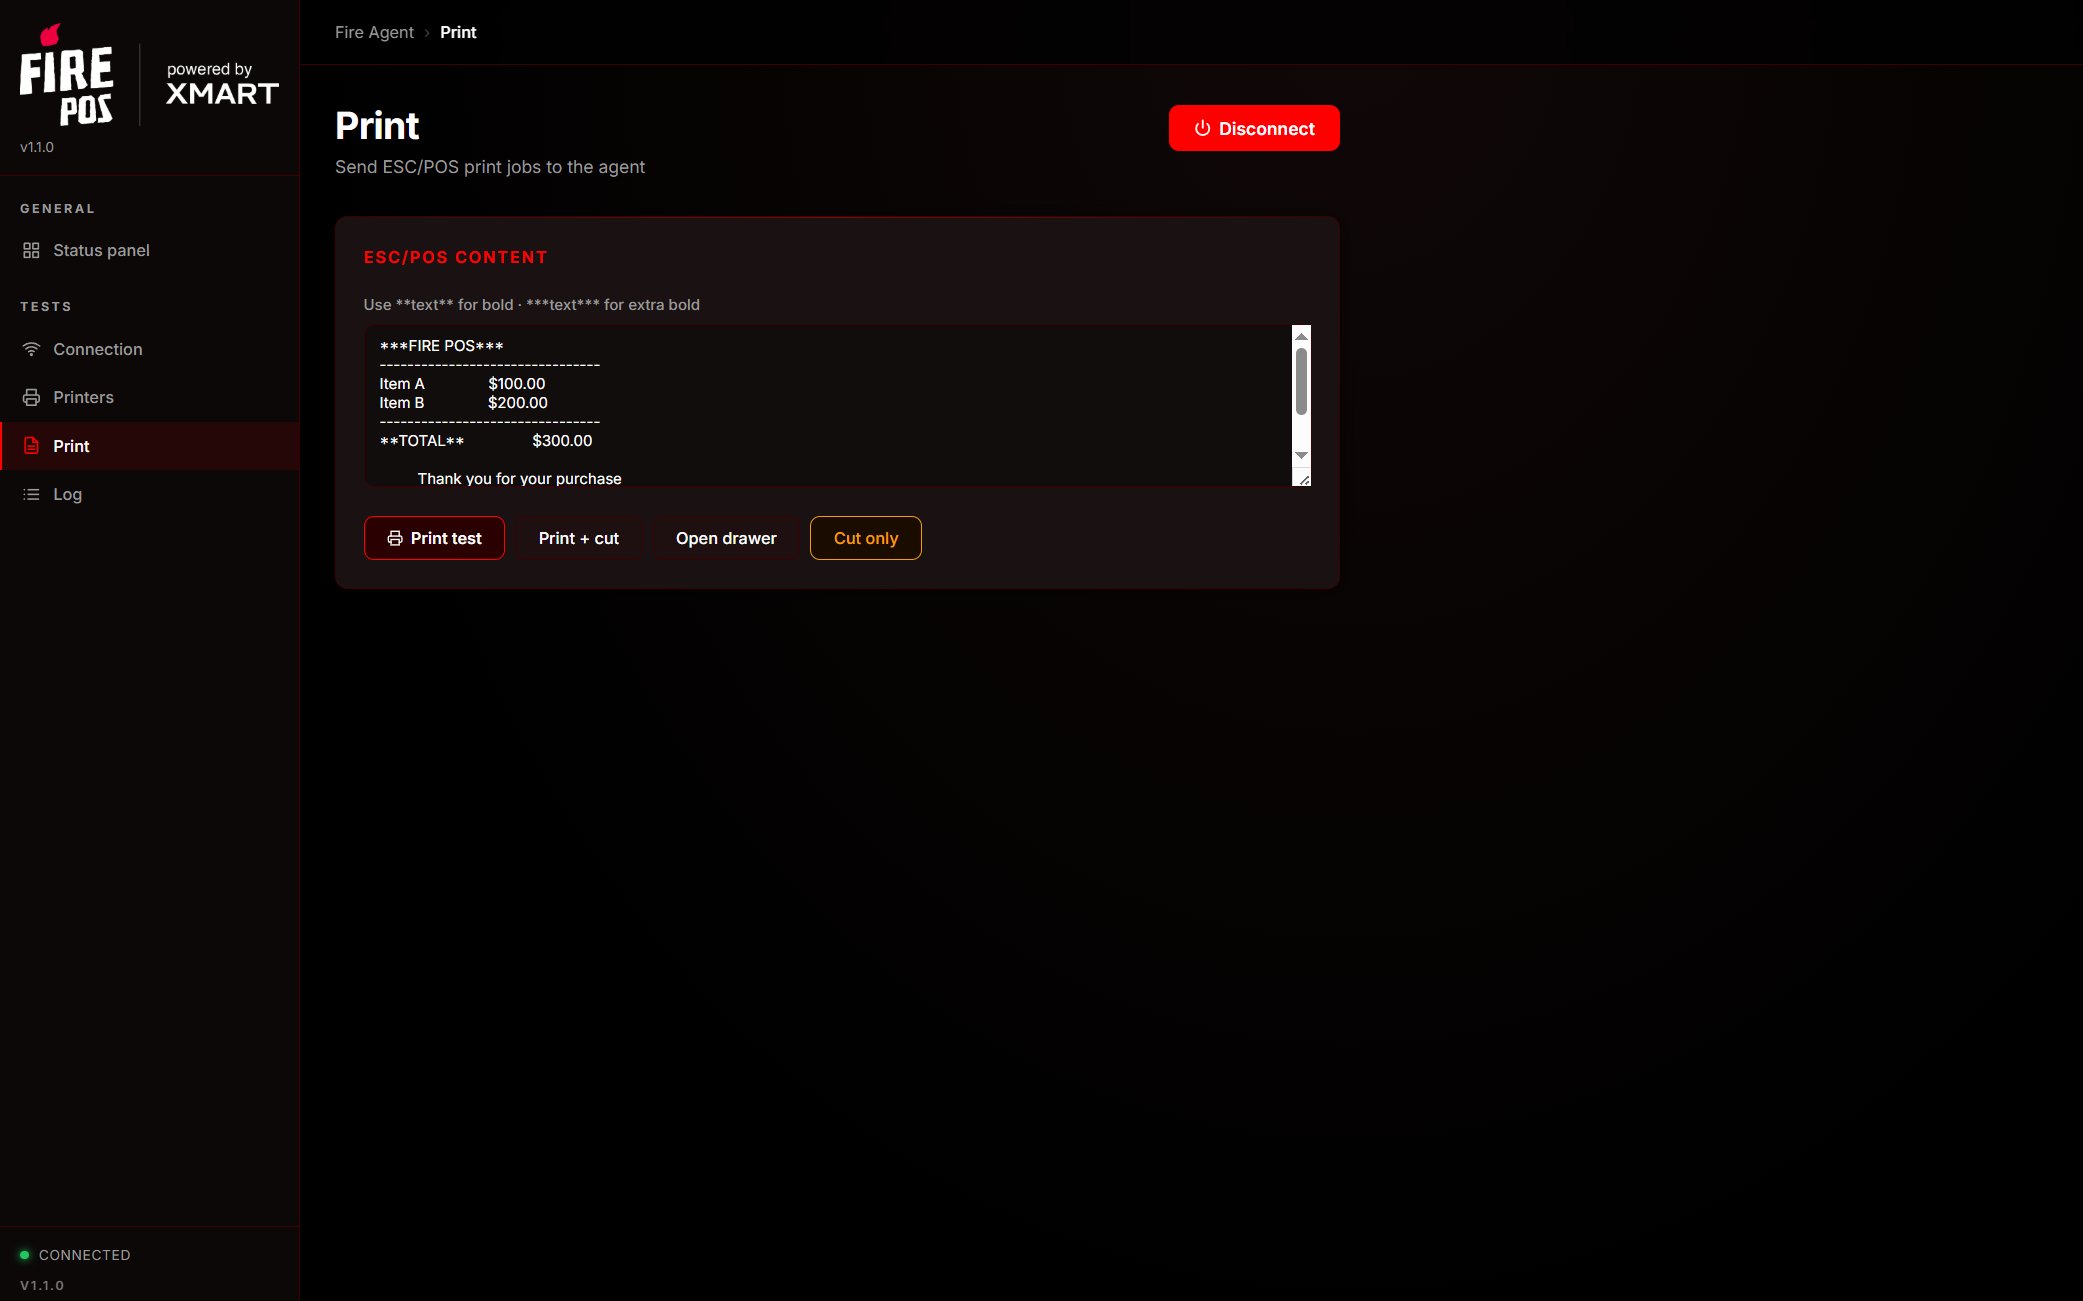 1. Make sure you **selected a printer** in the previous section.
2. Edit the receipt content in the **ESC/POS content** box (it comes with a preloaded example).
3. Use one of the four buttons:
| Button | Action |
| --------------- | -------------------------------------------------------------------- |
| **Print test** | Prints the text box content (without cutting the paper) |
| **Print + cut** | Prints the content and **cuts the paper** at the end |
| **Open drawer** | Sends the pulse to **open the cash drawer** connected to the printer |
| **Cut only** | Feeds paper and **cuts**, without printing text |
The result of each action appears in the **Log** section.
### Log
Shows, with a timestamp, every message exchanged with the agent:
1. Make sure you **selected a printer** in the previous section.
2. Edit the receipt content in the **ESC/POS content** box (it comes with a preloaded example).
3. Use one of the four buttons:
| Button | Action |
| --------------- | -------------------------------------------------------------------- |
| **Print test** | Prints the text box content (without cutting the paper) |
| **Print + cut** | Prints the content and **cuts the paper** at the end |
| **Open drawer** | Sends the pulse to **open the cash drawer** connected to the printer |
| **Cut only** | Feeds paper and **cuts**, without printing text |
The result of each action appears in the **Log** section.
### Log
Shows, with a timestamp, every message exchanged with the agent:
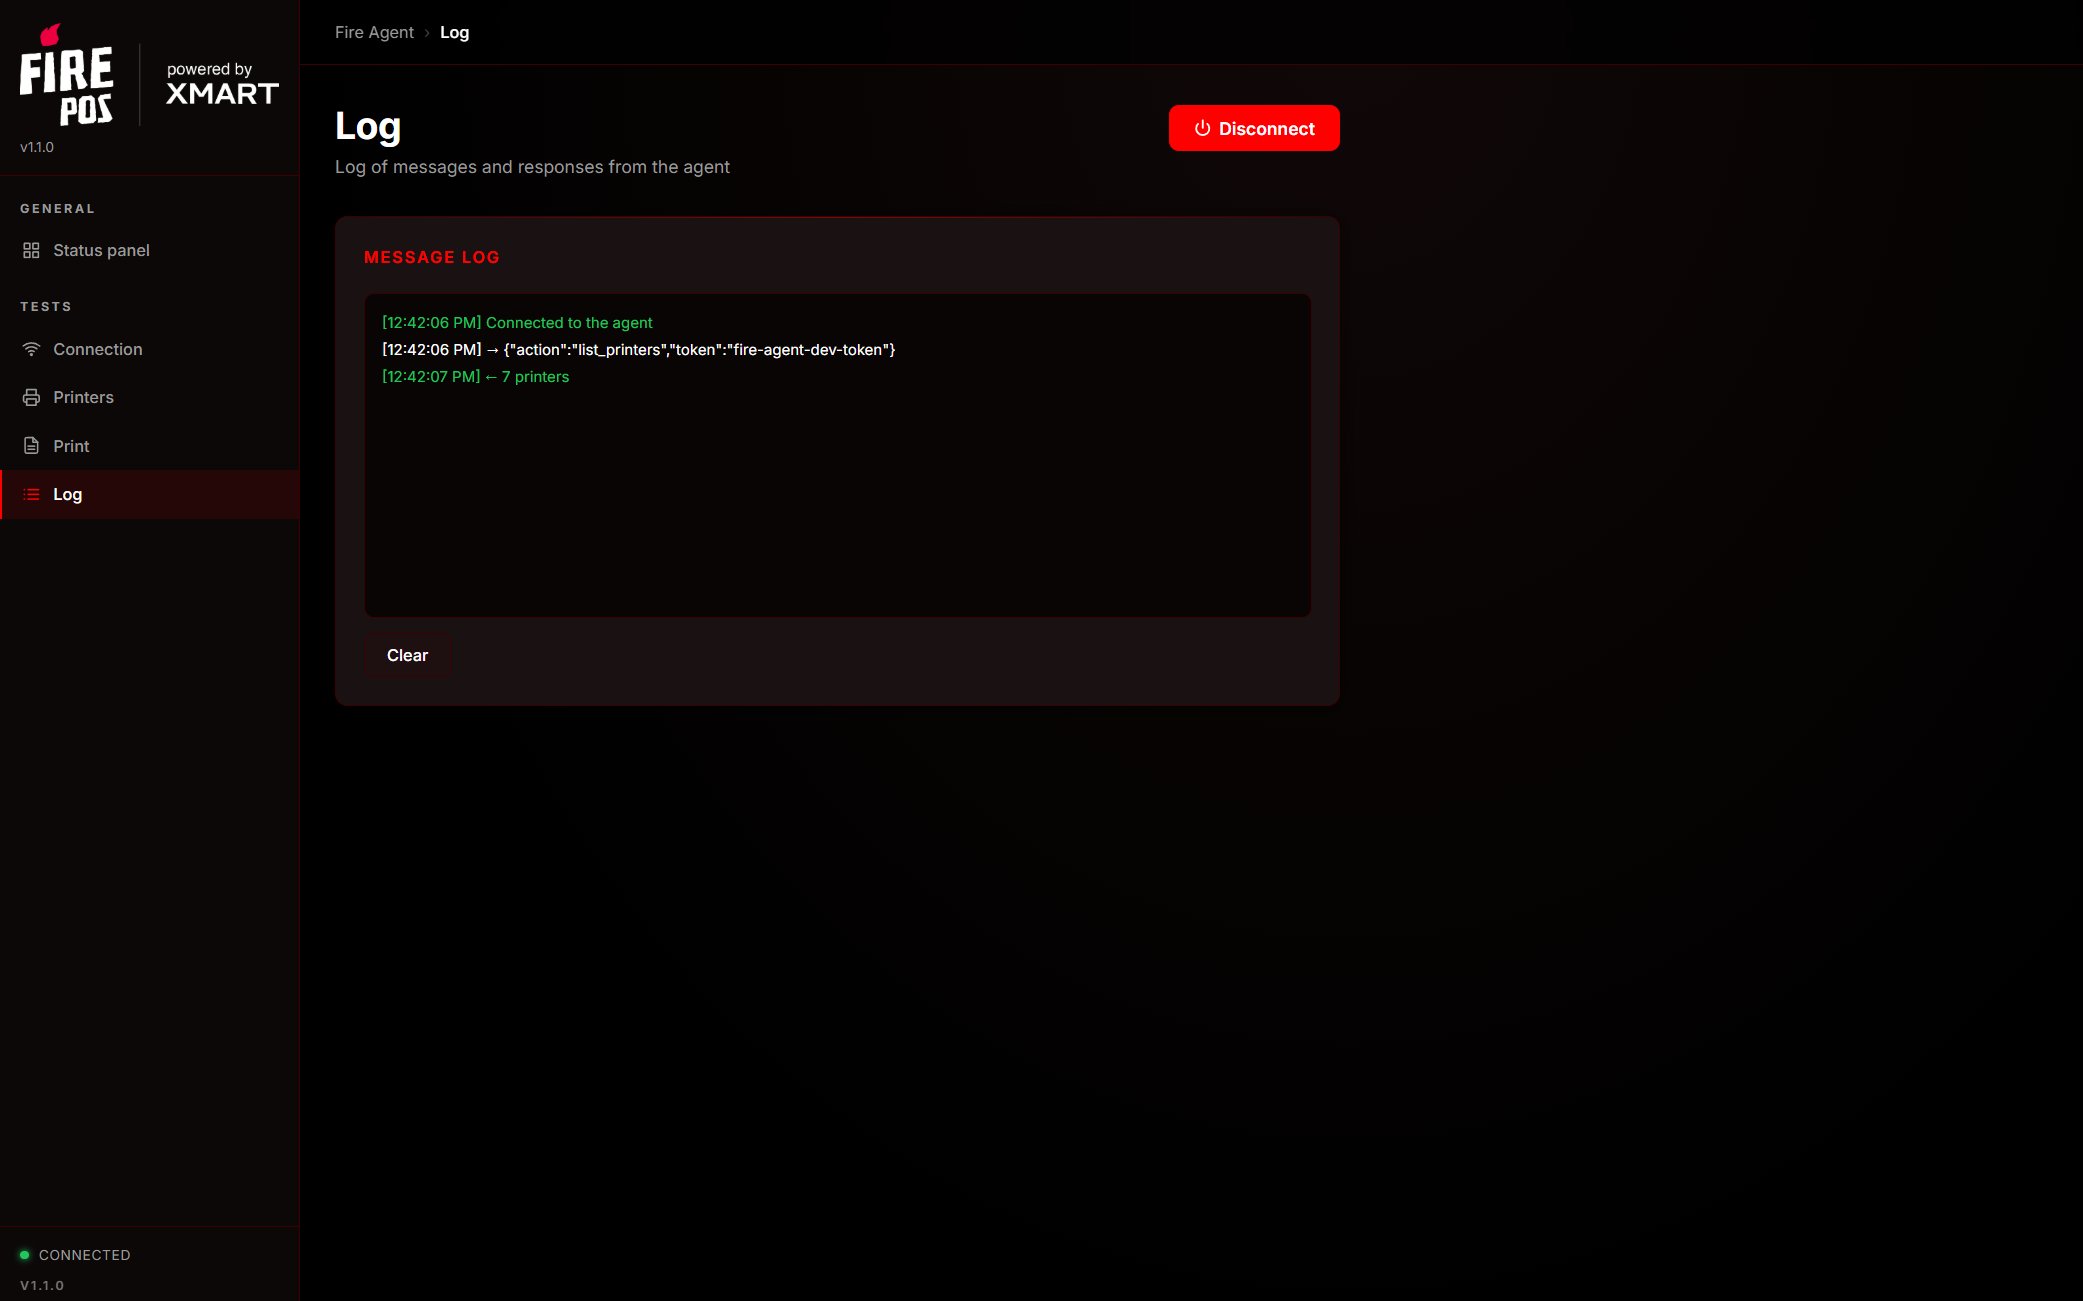 * Yellow: messages **sent** (→) to the agent.
* Green: **successful** responses (← `print_ok`, `printers`, `pong`).
* Red: **errors** (← ERROR: ...).
Use **Clear** to empty the log. It is the first place to check when something fails.
### Receipt formatting
Inside the text box you can apply emphasis with markers:
| Type | Result on the receipt |
| ------------ | --------------------------------------- |
| `**text**` | Bold |
| `***text***` | Bold + double width (highlighted title) |
The content is centered automatically and feed lines are added at the end.
### Automatic saving
The page remembers its setup in the browser (`localStorage`):
| Data | Saved when | Restored on open |
| --------------- | ------------------------------- | ------------------------- |
| Token | Each time you click **Connect** | The token field is filled |
| Printer | When selected or printed | Selected in the dropdown |
| Receipt content | Each time you print | The text box is filled |
If the token is already saved, the agent **connects on its own** when the page opens and lists the printers.
## Information panel
The panel is a **read-only** view (it does not print). It summarizes the agent status and refreshes itself every 30 seconds.
* Yellow: messages **sent** (→) to the agent.
* Green: **successful** responses (← `print_ok`, `printers`, `pong`).
* Red: **errors** (← ERROR: ...).
Use **Clear** to empty the log. It is the first place to check when something fails.
### Receipt formatting
Inside the text box you can apply emphasis with markers:
| Type | Result on the receipt |
| ------------ | --------------------------------------- |
| `**text**` | Bold |
| `***text***` | Bold + double width (highlighted title) |
The content is centered automatically and feed lines are added at the end.
### Automatic saving
The page remembers its setup in the browser (`localStorage`):
| Data | Saved when | Restored on open |
| --------------- | ------------------------------- | ------------------------- |
| Token | Each time you click **Connect** | The token field is filled |
| Printer | When selected or printed | Selected in the dropdown |
| Receipt content | Each time you print | The text box is filled |
If the token is already saved, the agent **connects on its own** when the page opens and lists the printers.
## Information panel
The panel is a **read-only** view (it does not print). It summarizes the agent status and refreshes itself every 30 seconds.
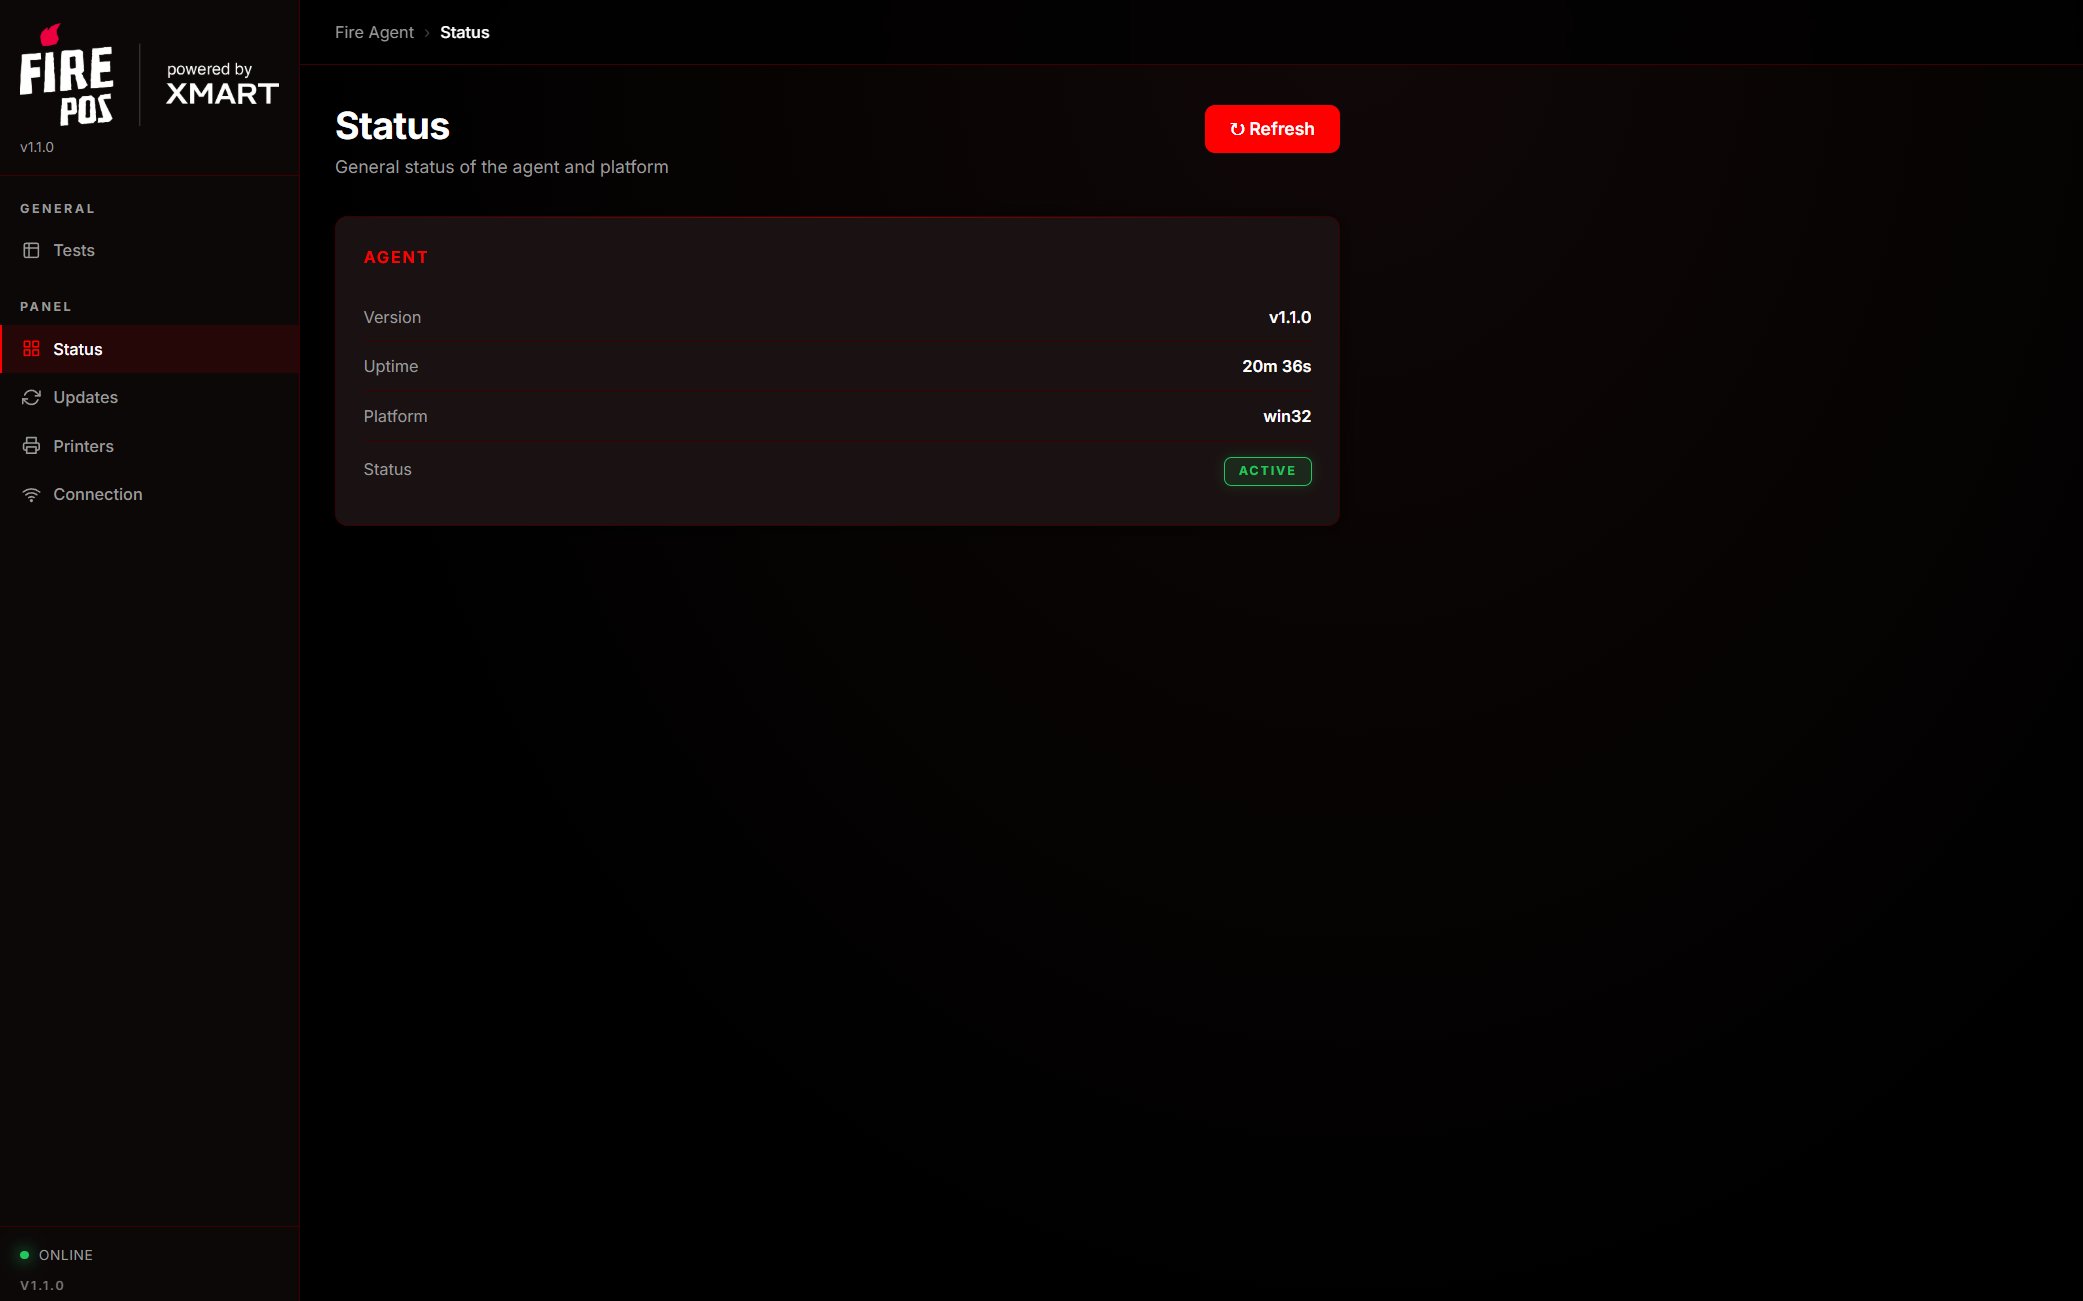 Open it at `http://localhost:9100/panel` (or click the Fire Agent tray icon). The sidebar has four sections:
| Section | Information shown |
| -------------- | ---------------------------------------------------------------------------- |
| **Status** | Agent version, uptime, platform and an activity indicator |
| **Updates** | Whether auto-update is active, remote version, status and last check |
| **Printers** | Detected printers with their status |
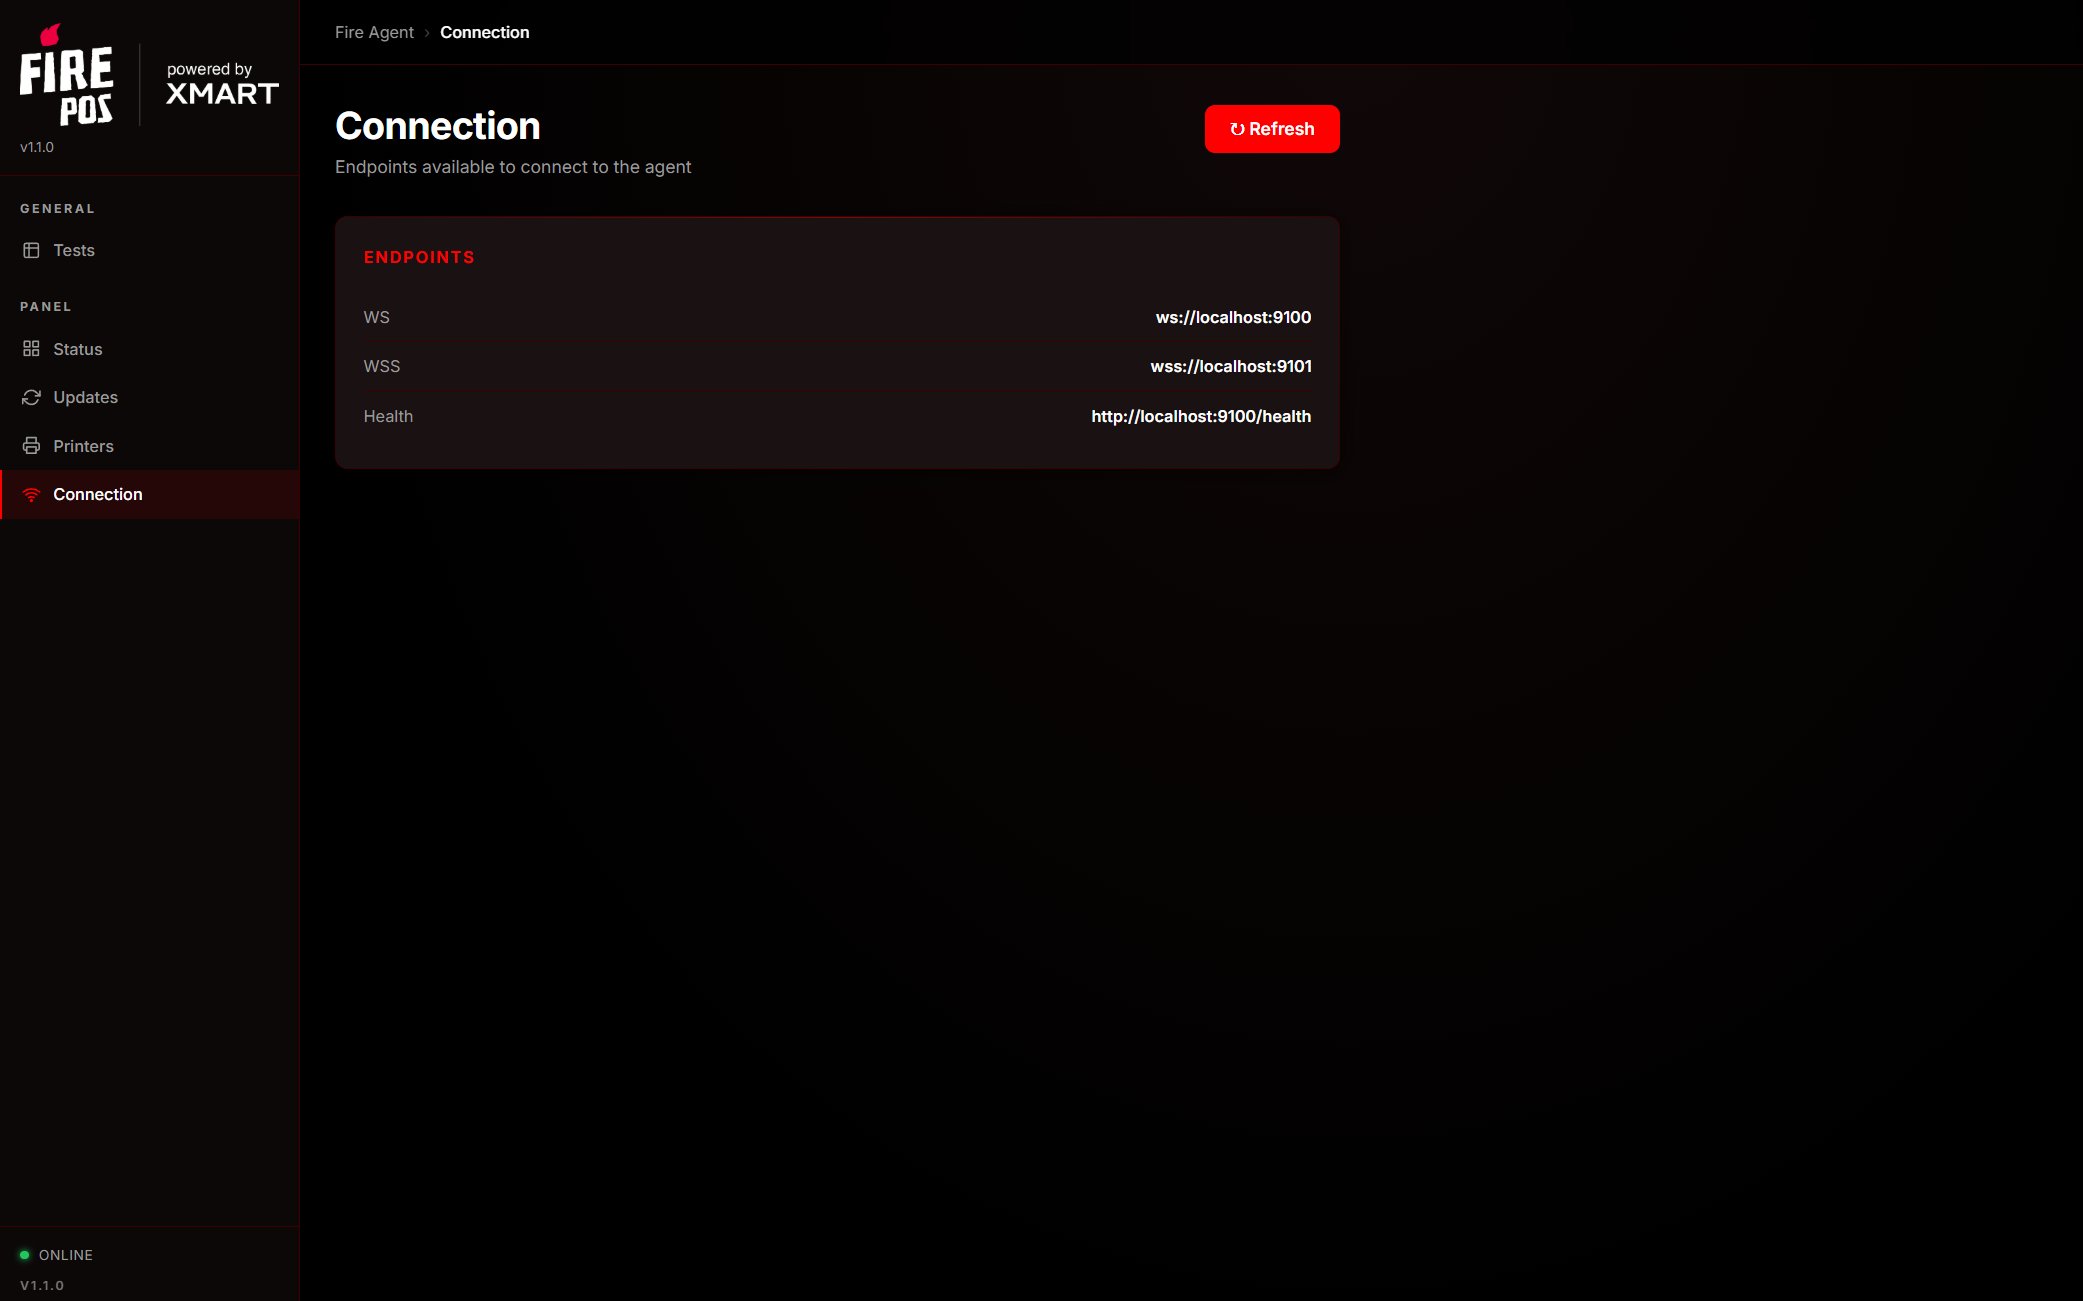
| **Connection** | Connection URLs: `ws://localhost:9100`, `wss://localhost:9101` and `/health` |
The **↻ Refresh** button forces an immediate refresh of all data.
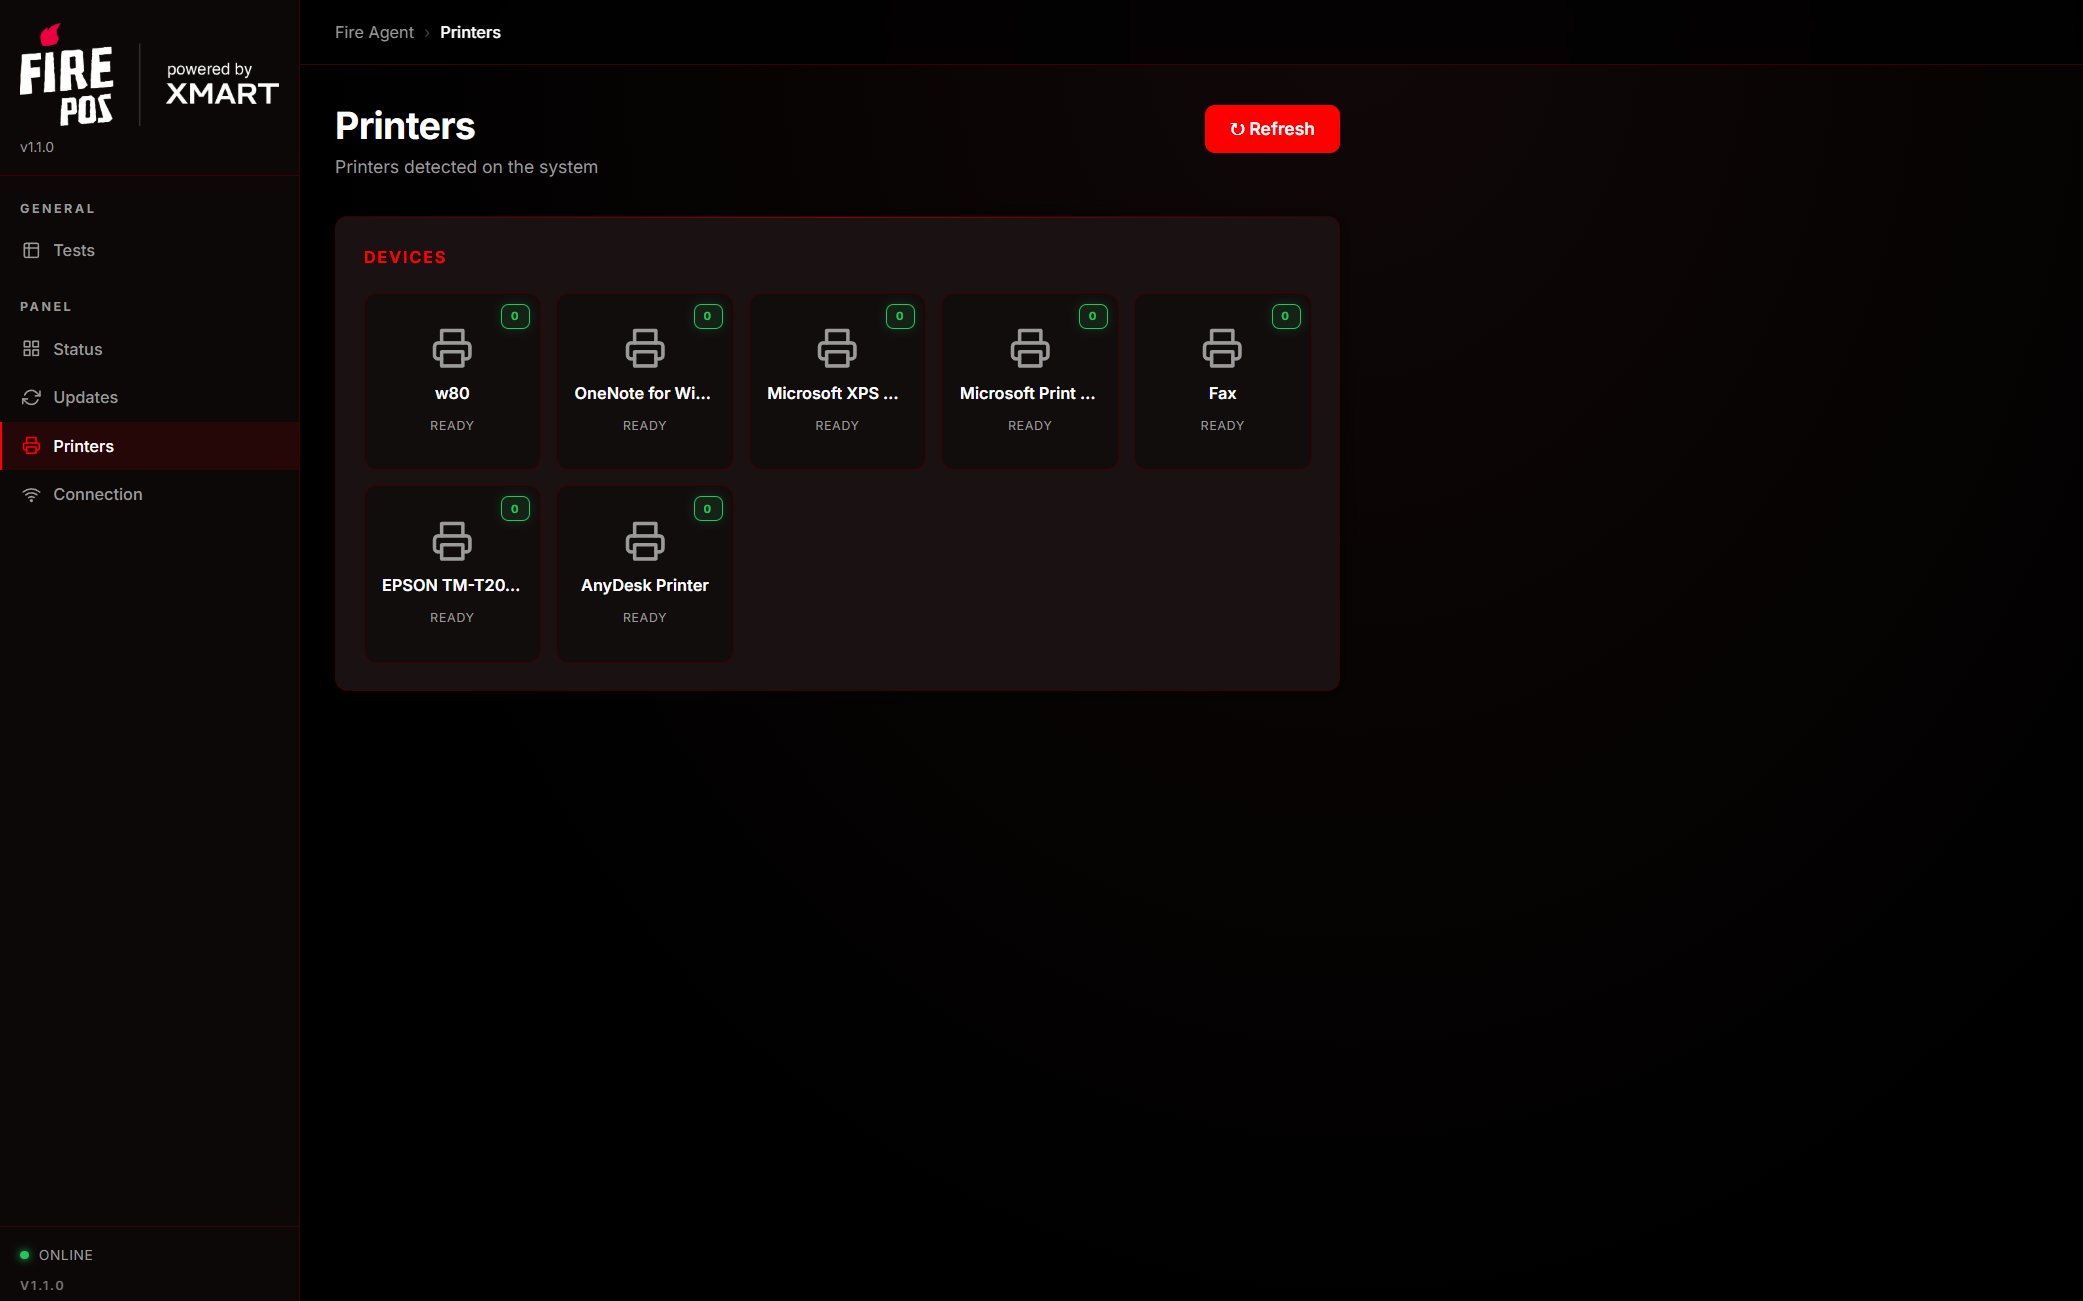
The **Printers** section shows the detected printers and their status as cards:
Open it at `http://localhost:9100/panel` (or click the Fire Agent tray icon). The sidebar has four sections:
| Section | Information shown |
| -------------- | ---------------------------------------------------------------------------- |
| **Status** | Agent version, uptime, platform and an activity indicator |
| **Updates** | Whether auto-update is active, remote version, status and last check |
| **Printers** | Detected printers with their status |
| **Connection** | Connection URLs: `ws://localhost:9100`, `wss://localhost:9101` and `/health` |
The **↻ Refresh** button forces an immediate refresh of all data.
The **Printers** section shows the detected printers and their status as cards:
 The **Connection** section shows the URLs available to connect to the agent:
 The status indicator turns **Offline** (red) if the agent stops responding.
## Light / dark theme
Both pages have a theme button (sun/moon icon) in the top-right corner. Clicking it toggles between dark and light mode, and the preference is saved in the browser.
## Troubleshooting
| Symptom | Likely cause | Fix |
| ----------------------------------------------------------- | ------------------------------------------------------ | ------------------------------------------------------------------------------------------------------------------------------------------------------------- |
| The page does not load (`localhost refused to connect`) | The agent is not running | Start Fire Agent (tray) or restart the PC; verify with `http://localhost:9100/health` |
| **Error** status when clicking Connect | The agent is not responding or the port changed | Confirm the agent is active and you are using the correct port (`FIRE_AGENT_PORT`) |
| The log shows `ERROR: ... 1001` or `Unauthorized` | Wrong token | Enter the correct token in the Connection section and reconnect |
| No printer appears | The driver is not installed in Windows | Install the driver from Windows settings and click **Refresh** |
| The receipt prints but does not cut | The printer does not support the cut command | Use **Print test** (no cut) or check your printer manual |
| The drawer does not open | Different drawer wiring or voltage | Check that the drawer is connected to the printer's RJ port and powered on |
| The POS HTTPS page cannot connect to `wss://localhost:9101` | The browser does not trust the self-signed certificate | Open `https://localhost:9101/health` once and accept the warning, or import the certificate (see [Windows installation](/en/manuals/fire-agent/installation)) |
The status indicator turns **Offline** (red) if the agent stops responding.
## Light / dark theme
Both pages have a theme button (sun/moon icon) in the top-right corner. Clicking it toggles between dark and light mode, and the preference is saved in the browser.
## Troubleshooting
| Symptom | Likely cause | Fix |
| ----------------------------------------------------------- | ------------------------------------------------------ | ------------------------------------------------------------------------------------------------------------------------------------------------------------- |
| The page does not load (`localhost refused to connect`) | The agent is not running | Start Fire Agent (tray) or restart the PC; verify with `http://localhost:9100/health` |
| **Error** status when clicking Connect | The agent is not responding or the port changed | Confirm the agent is active and you are using the correct port (`FIRE_AGENT_PORT`) |
| The log shows `ERROR: ... 1001` or `Unauthorized` | Wrong token | Enter the correct token in the Connection section and reconnect |
| No printer appears | The driver is not installed in Windows | Install the driver from Windows settings and click **Refresh** |
| The receipt prints but does not cut | The printer does not support the cut command | Use **Print test** (no cut) or check your printer manual |
| The drawer does not open | Different drawer wiring or voltage | Check that the drawer is connected to the printer's RJ port and powered on |
| The POS HTTPS page cannot connect to `wss://localhost:9101` | The browser does not trust the self-signed certificate | Open `https://localhost:9101/health` once and accept the warning, or import the certificate (see [Windows installation](/en/manuals/fire-agent/installation)) |