> ## Documentation Index
> Fetch the complete documentation index at: https://docs.fire.rest/llms.txt
> Use this file to discover all available pages before exploring further.
# Linking
> How to link a POS terminal to a store from the Fire backoffice.
This guide explains how to register a POS terminal against a store. Registration is a one-time operation per device: the administrator generates a single-use code from the backoffice and the operator types it into the POS app. Once linked, the terminal stays bound to the store and cashiers can sign in with their PIN.
## Prerequisites
* Access to the Fire backoffice at **[app.fire.rest](https://app.fire.rest)**, with permissions on the store and the **Fire POS Admin** role.
* The device powered on, with an internet connection and a supported browser. See the [terminal requirements](/en/manuals/pos/hardware-requirements) for the full hardware, operating system, browser and network specifications.
**FIRE POS is not installed.** It is a web application opened in the terminal browser — there is no executable or installer. Optionally, it can be installed as a PWA from the browser itself so it opens full screen.
This guide uses two different applications: the **backoffice**, where you generate the code, and the **POS**, where you type it in.
| Environment | Backoffice (steps 1-5) | FIRE POS (steps 6-8) |
| -------------- | ---------------------------------------------- | ---------------------------------------------- |
| **Production** | [app.fire.rest](https://app.fire.rest) | [pos.fire.rest](https://pos.fire.rest) |
| **Staging** | [stg.app.fire.rest](https://stg.app.fire.rest) | [stg.pos.fire.rest](https://stg.pos.fire.rest) |
**Both applications must be on the same environment.** A code generated in the production backoffice cannot be redeemed on the staging POS, or the other way around — the POS rejects it as an invalid code.
For terminals that print receipts and vouchers, also install **Fire Agent** on the device. See the [Fire Agent guide](/en/manuals/fire-agent/installation) for the full setup.
Windows installer for local thermal printing.
## 1. Select country and vendor
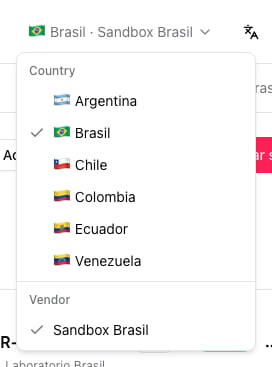
Sign in to the backoffice at **[app.fire.rest](https://app.fire.rest)** (or [stg.app.fire.rest](https://stg.app.fire.rest) on staging). From the top-right corner, open the selector and choose the country and vendor you will operate under. Every action in this guide happens inside that context.
 ## 2. Confirm the Fire POS channel
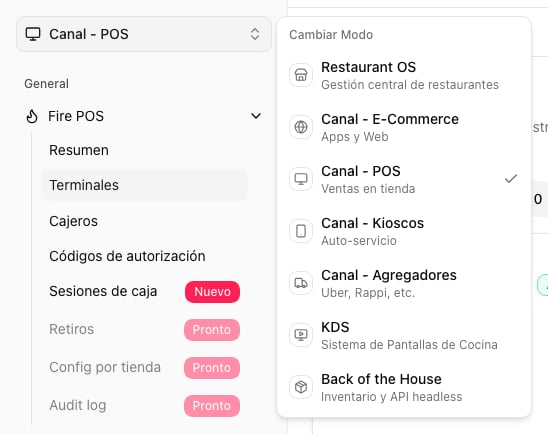
In the side menu, make sure the **Fire POS** channel is selected. The Terminals section is only available inside that channel.
## 2. Confirm the Fire POS channel
In the side menu, make sure the **Fire POS** channel is selected. The Terminals section is only available inside that channel.
 ## 3. Pick the target store
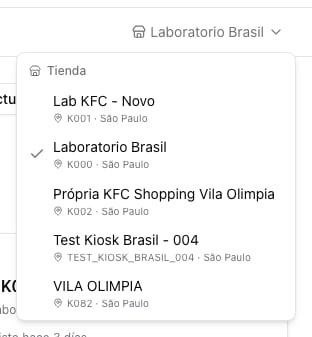
In the store selector in the header, choose the store the terminal will be registered against. The slot you generate in the next step is bound to that store — you cannot reassign it later.
## 3. Pick the target store
In the store selector in the header, choose the store the terminal will be registered against. The slot you generate in the next step is bound to that store — you cannot reassign it later.
 ## 4. Open the Terminals section
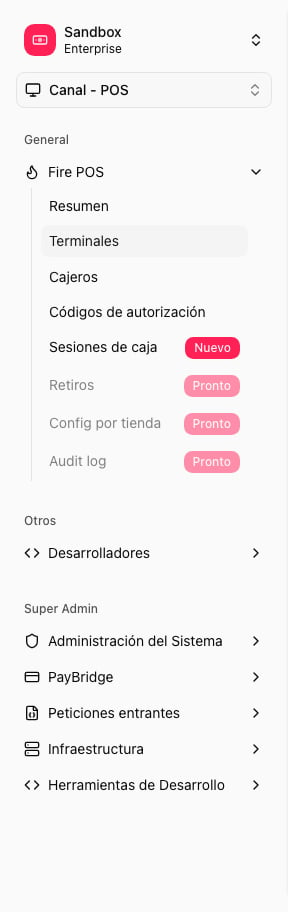
In the side menu open **POS → Terminals**. You will see the list of already-registered terminals grouped by status (Active, Pending slots, Suspended, Revoked).
## 4. Open the Terminals section
In the side menu open **POS → Terminals**. You will see the list of already-registered terminals grouped by status (Active, Pending slots, Suspended, Revoked).
 ## 5. Create a linking slot
1. In the top-right corner click **+ Create slot**.
## 5. Create a linking slot
1. In the top-right corner click **+ Create slot**.
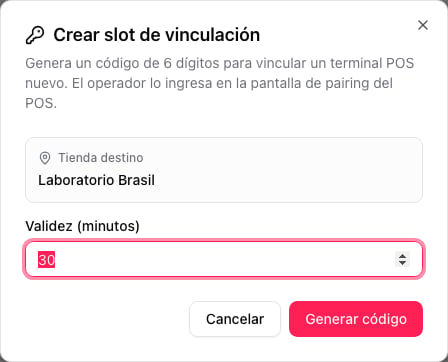
 2. **Create linking slot modal.** Verify the target store and choose how long the code is valid (default **30 minutes**). Click **Generate code**.
 3. The backoffice shows a **6-digit code** with its expiration time. Use the **Copy** button or write it down. The code is shown once and can be used to link a single device.
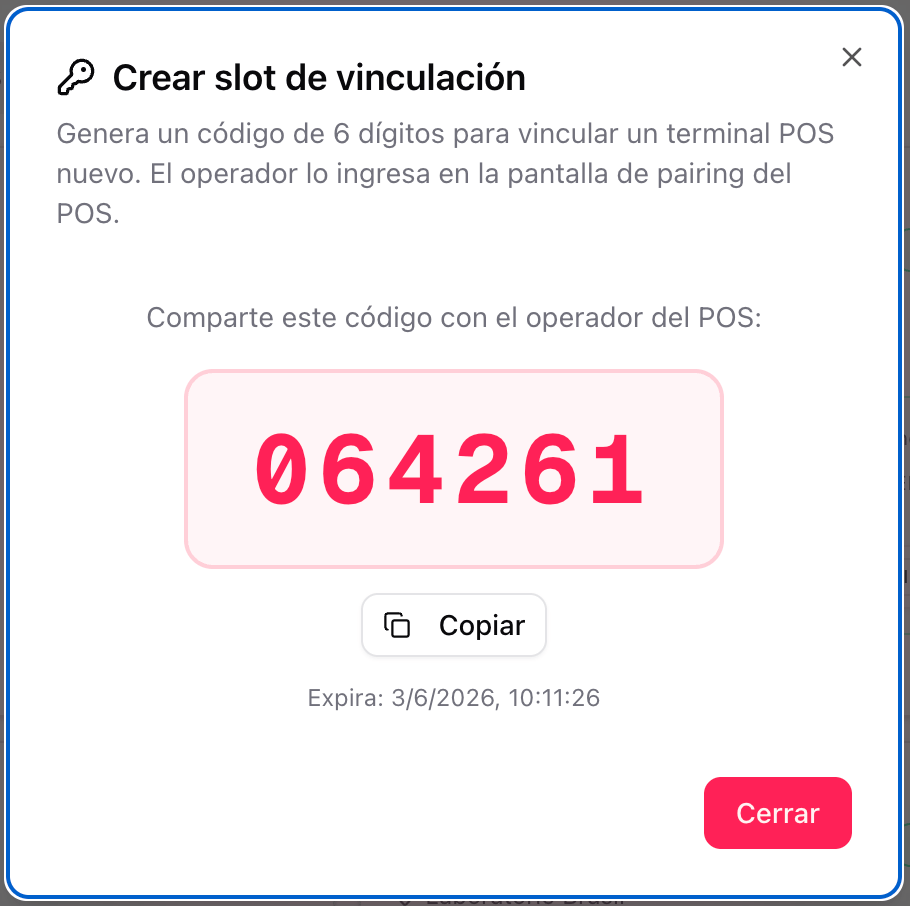 If the code expires before it is used, the slot becomes invalid. Repeat this step to generate a new one.
## 6. Open the POS app
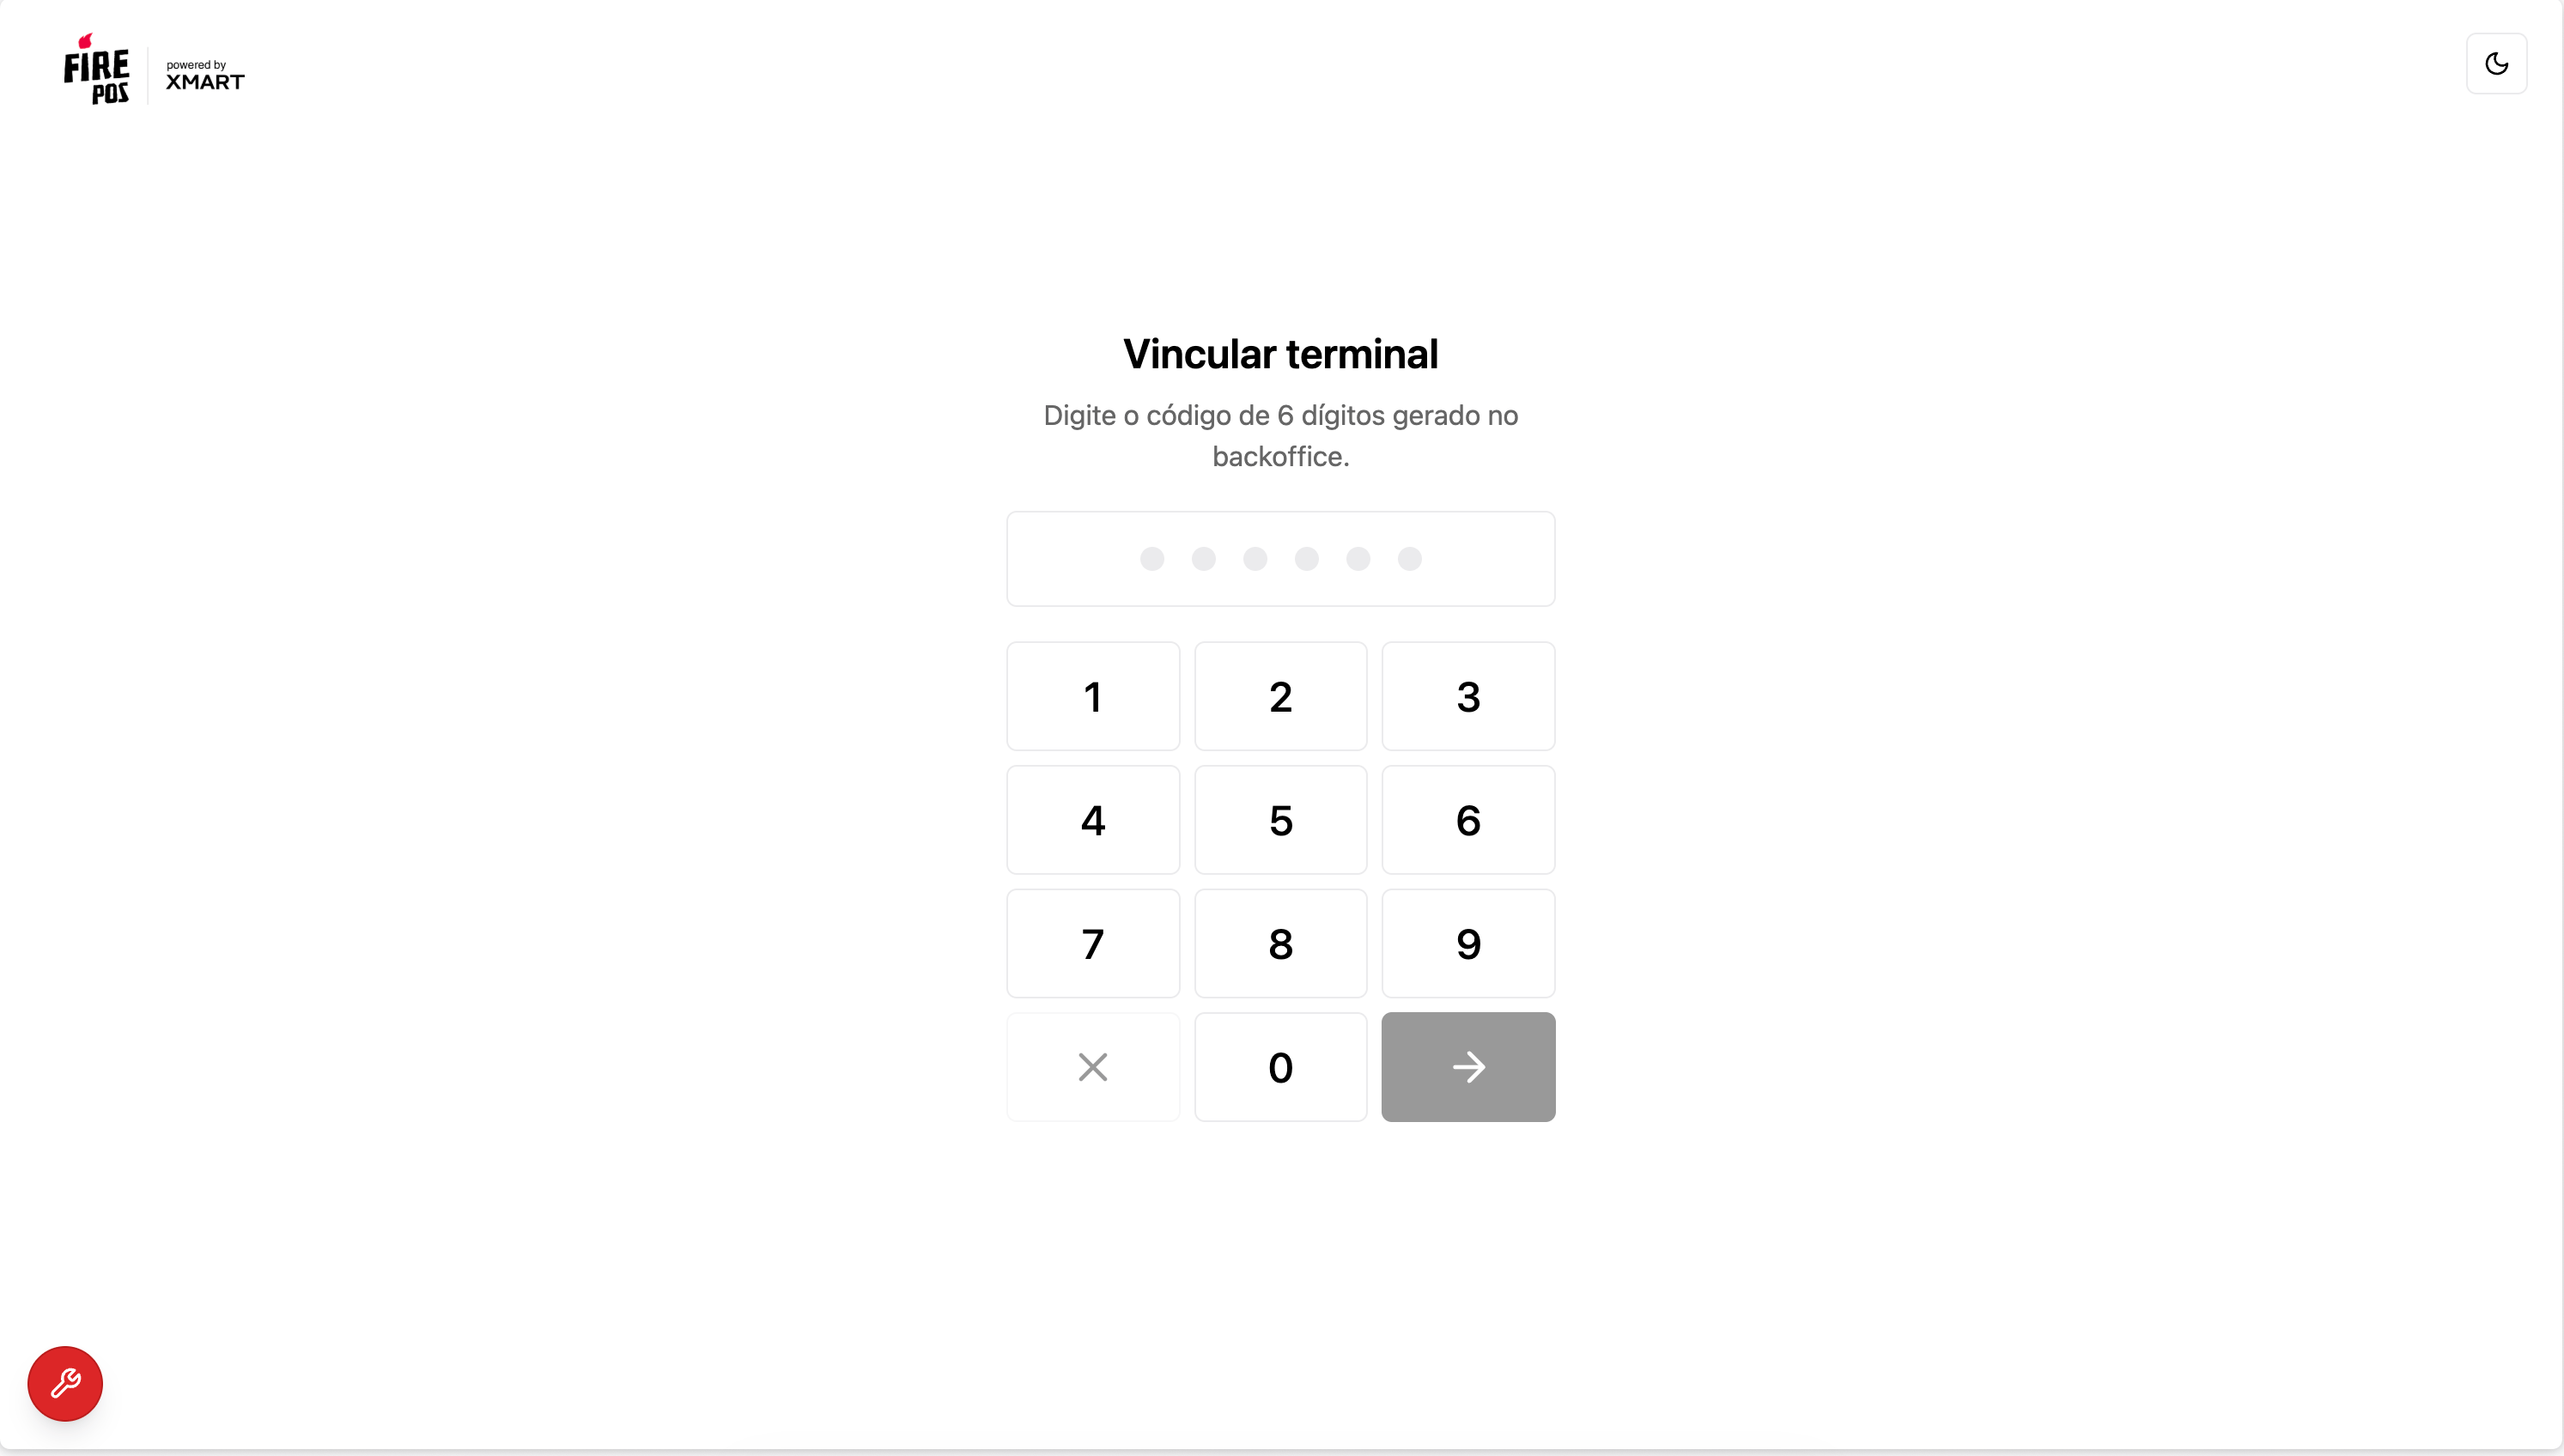
In the device browser, open **[pos.fire.rest](https://pos.fire.rest)** — or [stg.pos.fire.rest](https://stg.pos.fire.rest) if you generated the code on staging. If the terminal has never been linked, the home screen shows the **Link terminal** title and a 6-digit numeric keypad.
If the code expires before it is used, the slot becomes invalid. Repeat this step to generate a new one.
## 6. Open the POS app
In the device browser, open **[pos.fire.rest](https://pos.fire.rest)** — or [stg.pos.fire.rest](https://stg.pos.fire.rest) if you generated the code on staging. If the terminal has never been linked, the home screen shows the **Link terminal** title and a 6-digit numeric keypad.
 ## 7. Type the code
Type the 6 digits on the keypad. As soon as the sixth digit is entered, the app validates the code automatically — there is no confirm button.
## 7. Type the code
Type the 6 digits on the keypad. As soon as the sixth digit is entered, the app validates the code automatically — there is no confirm button.
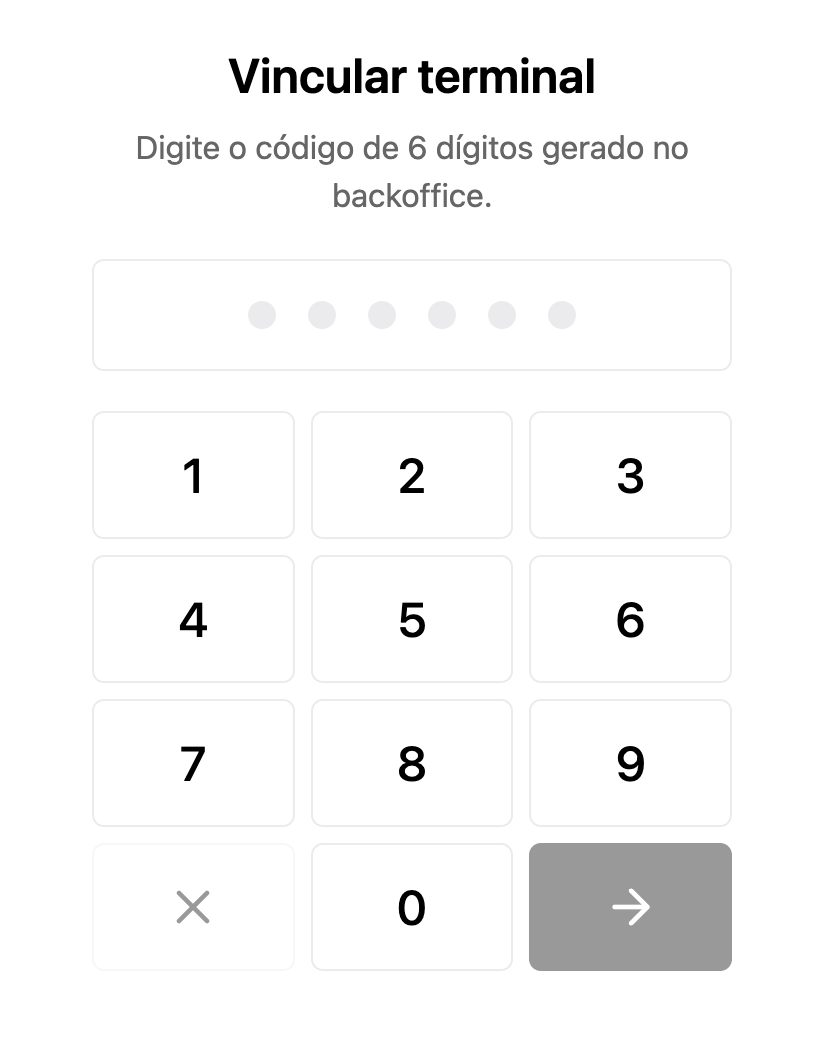 While the code is being validated a loading indicator is shown. If the code is invalid or expired, an error message appears and the keypad is cleared so you can try again.
## 8. The terminal is linked
Once validation succeeds, the terminal receives its name, store and internal credentials, then redirects automatically to the **cashier sign-in screen**. From that point on the device operates autonomously — cashiers can sign in with their PIN without using the code again.
While the code is being validated a loading indicator is shown. If the code is invalid or expired, an error message appears and the keypad is cleared so you can try again.
## 8. The terminal is linked
Once validation succeeds, the terminal receives its name, store and internal credentials, then redirects automatically to the **cashier sign-in screen**. From that point on the device operates autonomously — cashiers can sign in with their PIN without using the code again.
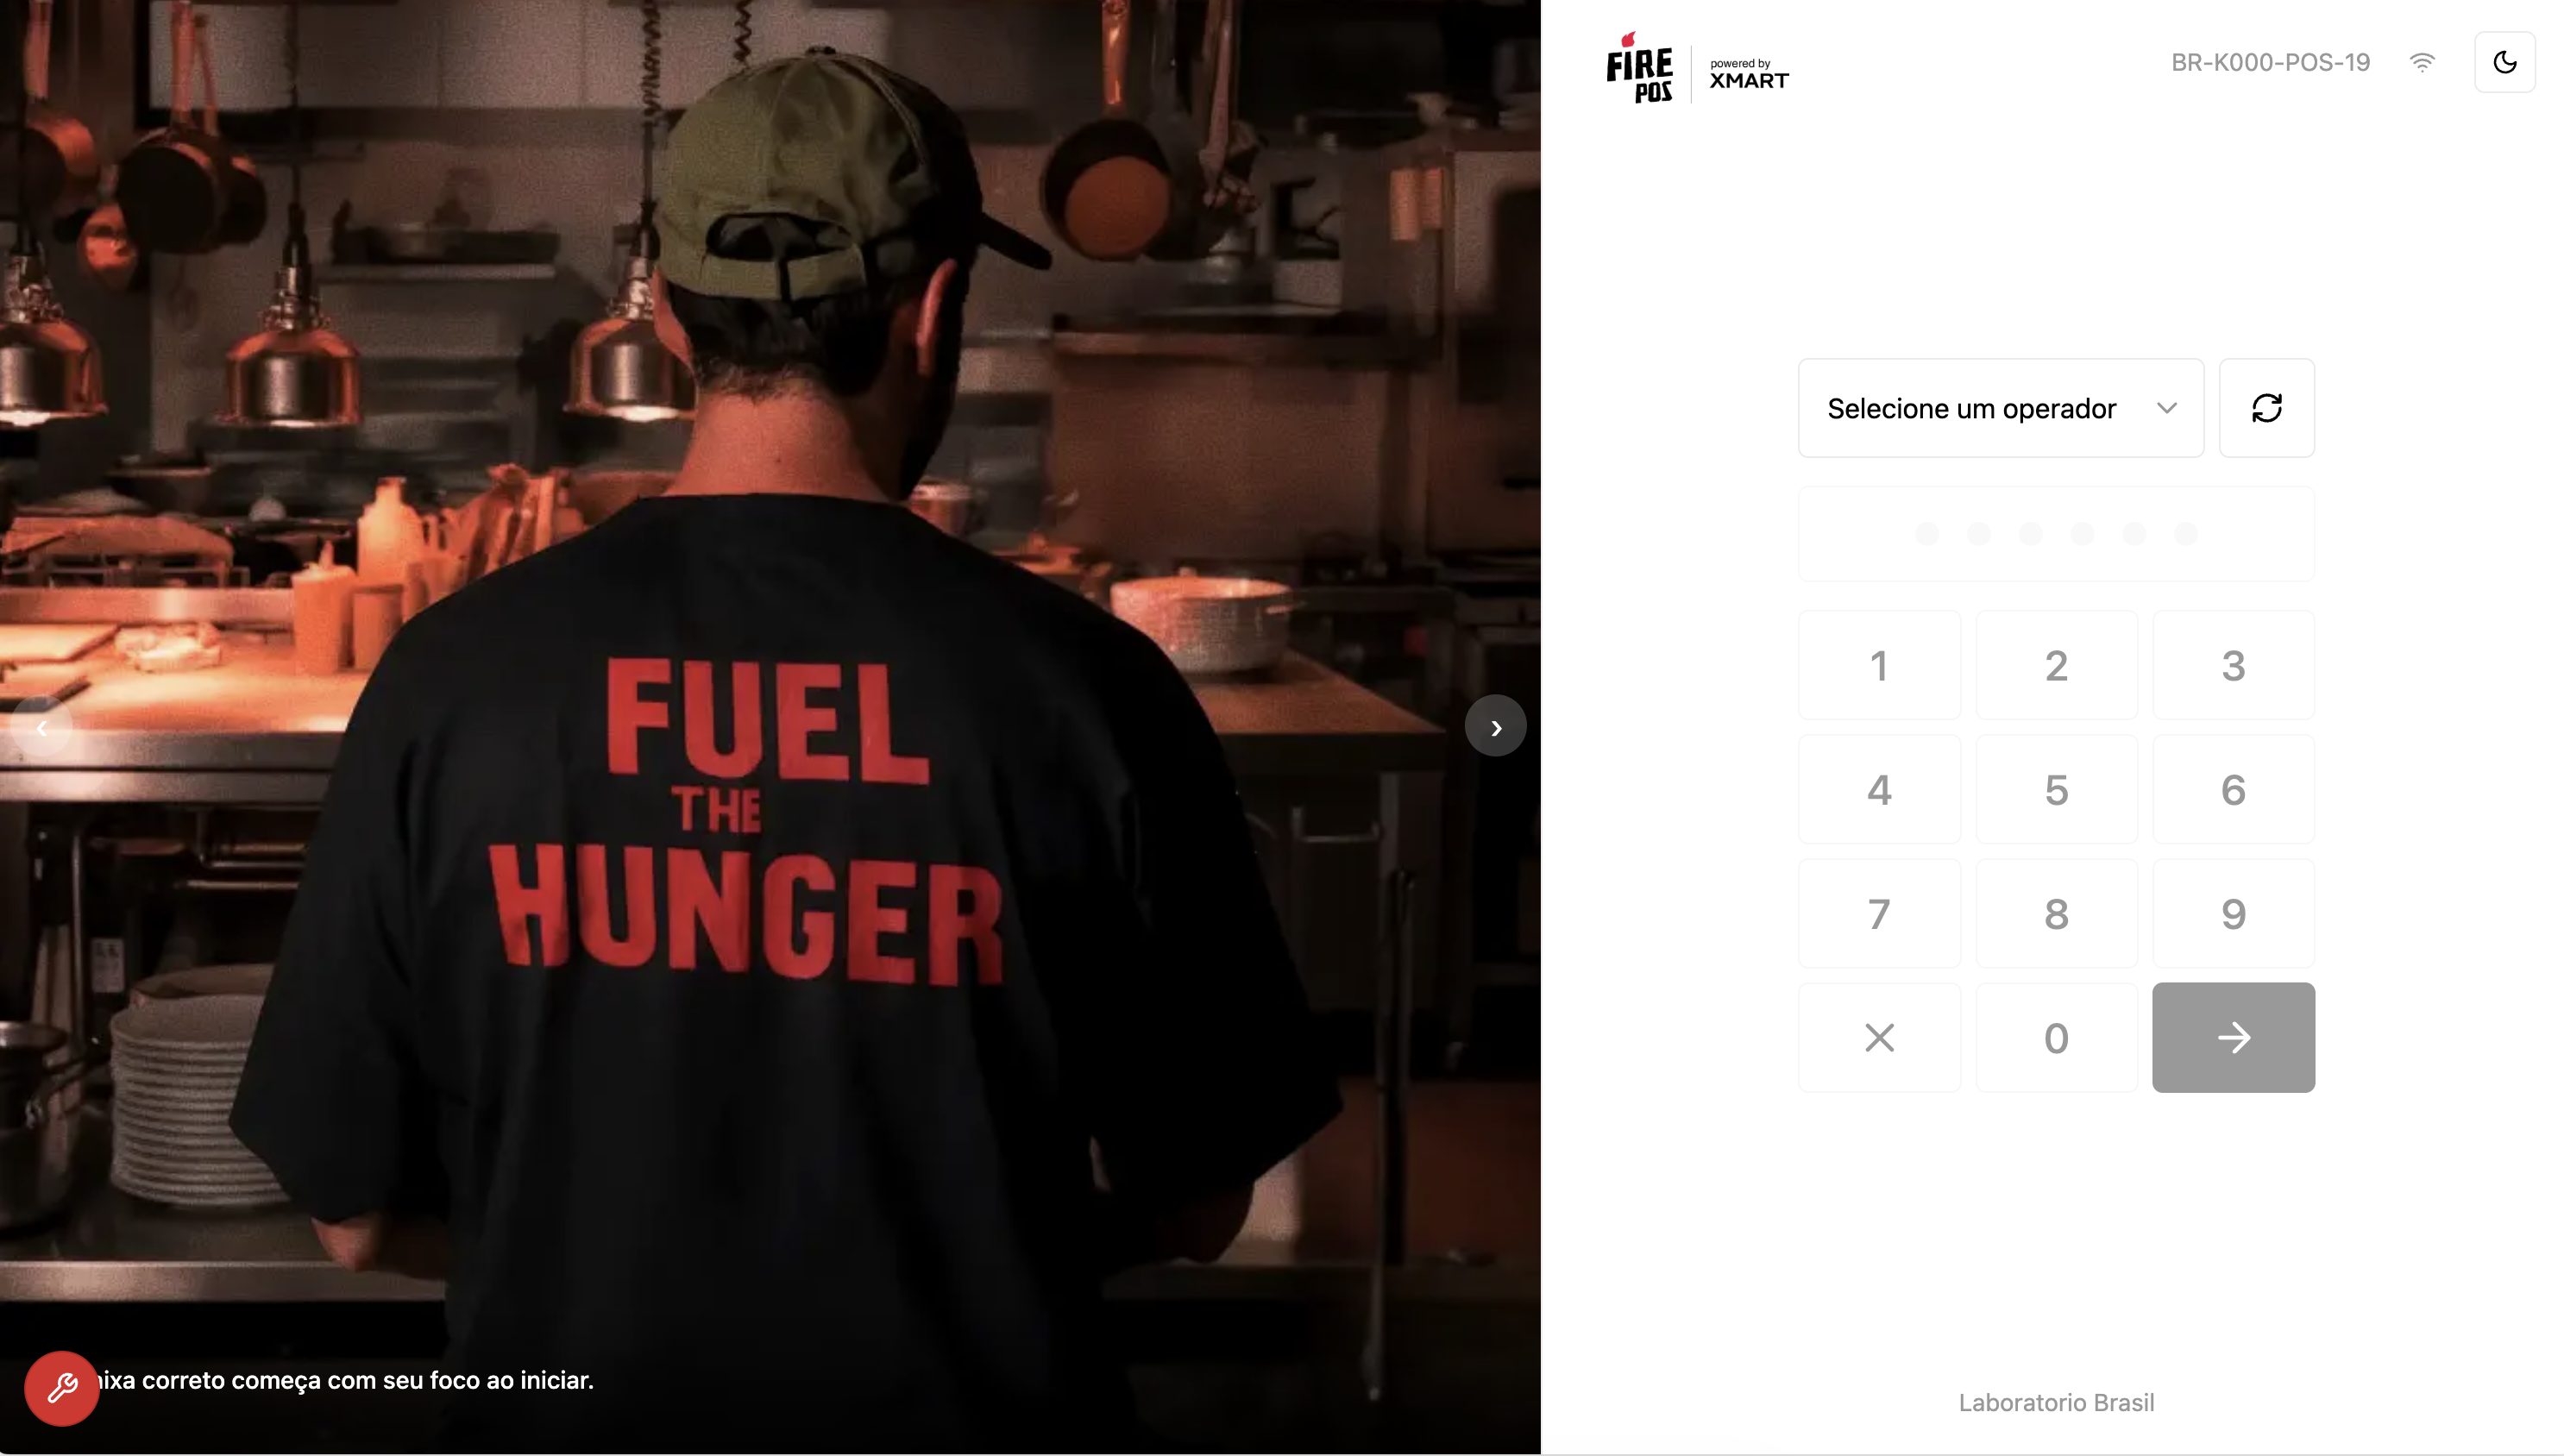 The terminal is linked to the store and ready to operate.
## Verifying from the backoffice
Go back to **POS → Terminals** and open the **Active** tab. The newly registered terminal appears in the list with its name, last seen time and **ACTIVE** status.
The terminal is linked to the store and ready to operate.
## Verifying from the backoffice
Go back to **POS → Terminals** and open the **Active** tab. The newly registered terminal appears in the list with its name, last seen time and **ACTIVE** status.
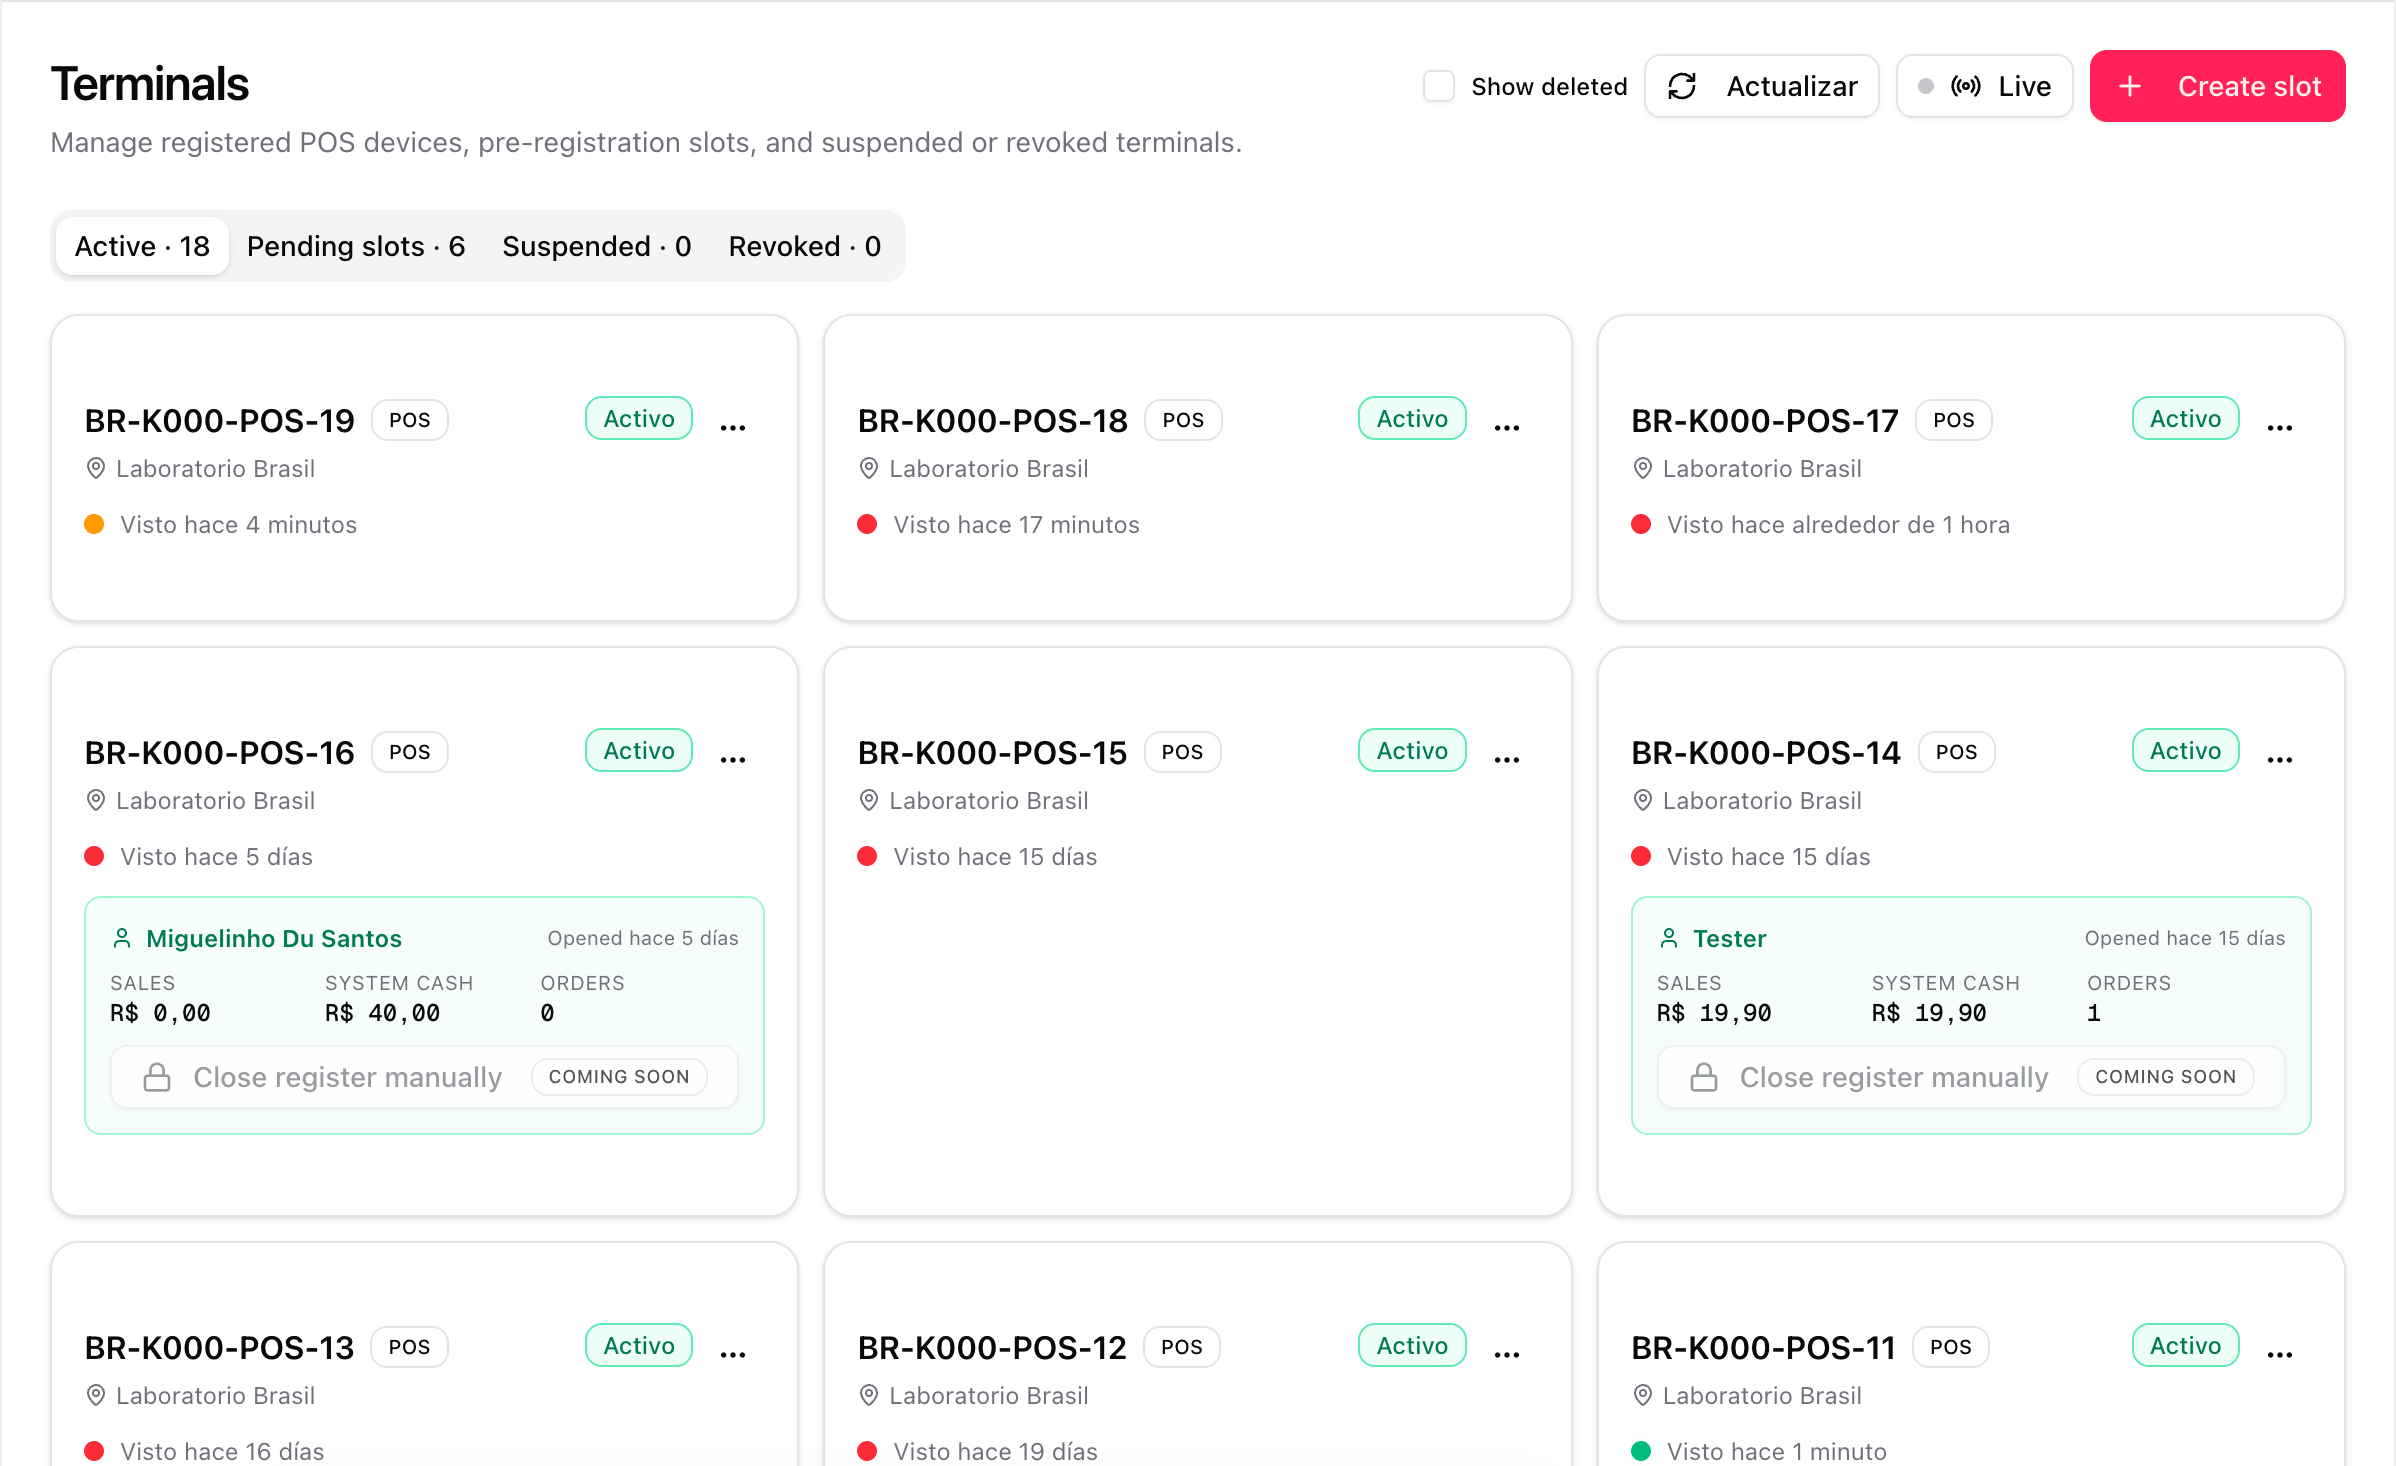 In the **Pending slots** tab the slot you generated should no longer be visible — it moved to **CLAIMED** and is consumed automatically.