

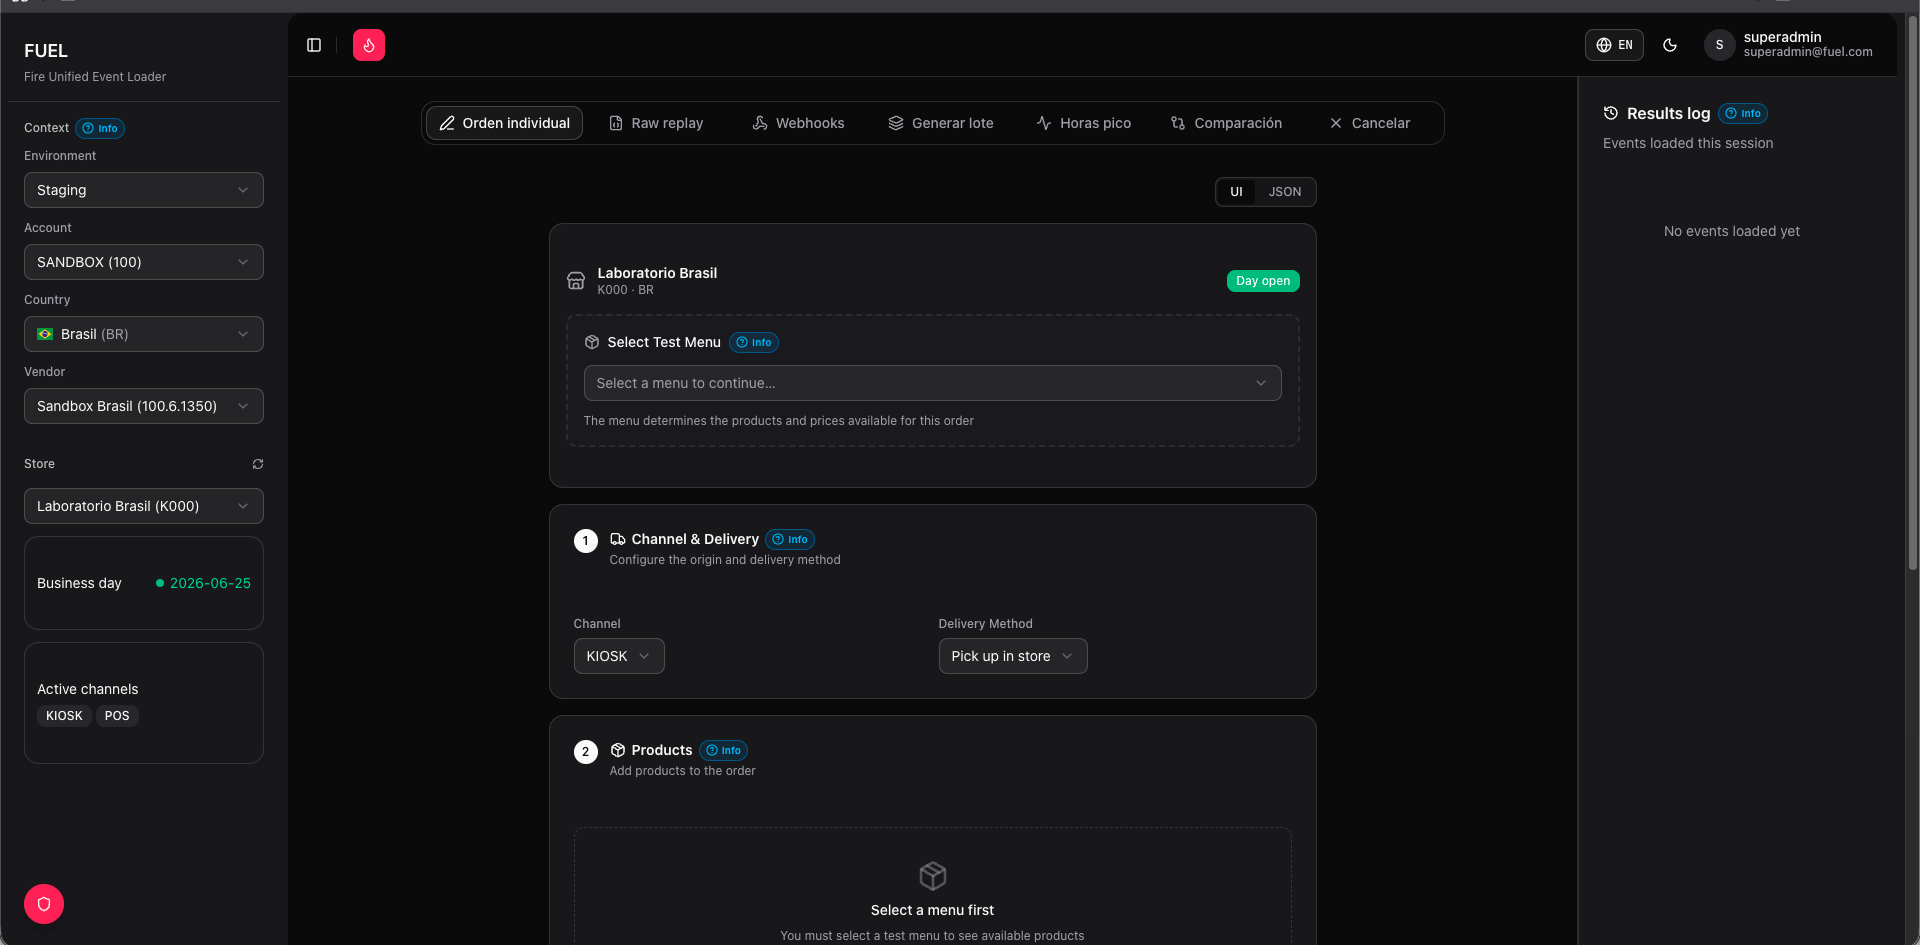
You must select an operating context (environment, account, country, vendor, and store) in the sidebar before the tab becomes functional.
Building and sending an order
1
Select a test menu
In the Test menu section, choose a menu from the dropdown. Test menus are managed by a superadmin and define the products, channels, and payment processors available for a given environment and vendor.You cannot proceed without a test menu selected — it is the catalog that populates the rest of the form.
2
Configure channel and delivery
In the Channel and delivery section, choose how the order reaches FIRE:
- Channel:
POS,KIOSK,APP, orAGGREGATOR - Delivery method:
pickup(the customer collects at the counter) ordelivery(requires a delivery address)
delivery, an address form expands below the delivery method selector.3
Add products
In the Products section, pick items from the catalog provided by your selected test menu. For each product you can:Products that have modifier groups (sauces, sizes, extras) show an Edit modifiers button. Tap it to expand the modifier panel and select or deselect options. Modifiers that are required must have a selection before the order can be injected.
- Set the quantity
- Override the unit price
Prices are expressed in the currency’s minimum unit. For BRL, enter centavos:
1200 equals R$12.00. For USD, enter dollars with decimals: 5.99 equals $5.99. Check the menu definition if you are unsure which unit a currency uses.4
Configure payment
In the Payment section:
- Processor: select the payment method (e.g., credit card, PIX, cash) from the processors defined in the test menu.
- TX status: choose the transaction outcome —
approved(green),pending(yellow), orrejected(red). This controls how FIRE handles the order’s payment state. - Amount: pre-filled from the product total; edit if you need a mismatch scenario.
5
Fill in client info
In the Client section, provide customer details. Fields used by FIRE’s fiscal pipeline (required for NFC-e / NFS-e in Brazil and equivalent documents in other countries) are marked:
- First name and last name
- Email and phone
- Government ID type and number
- Billing email and business name (for B2B fiscal documents)
6
Review the JSON preview
The JSON preview section updates in real time as you fill in the form. Expand it to inspect the exact payload that will be sent to
POST /v1/orders.7
Load the order
Click Load order. FUEL posts the payload to FIRE and displays the response below the button.
- A green banner confirms the order was accepted and shows the FIRE order ID.
- A red banner shows the error returned by FIRE (validation failure, auth error, etc.).
Advanced: raw JSON editor
If you need to send a payload that the form cannot express — unusual field combinations, legacy format testing, or a production order you copied — open the Payload JSON editor and paste your JSON directly. The form fields are ignored when the editor contains a valid JSON object. Use Regenerate IDs to replace theorderId and orderCode with fresh UUIDs before resending, avoiding idempotency rejections from FIRE.
Related
Batch
Send multiple orders at once with configurable distributions.
Raw replay
Search production orders and reinject them into any environment.