Prerequisites
- Access to the Fire backoffice with permissions on the store and the Fire POS Admin role.
- The store and vendor selected in the top bar.
- At least one linked and active POS terminal. See Linking.
1. Open the Cashiers section
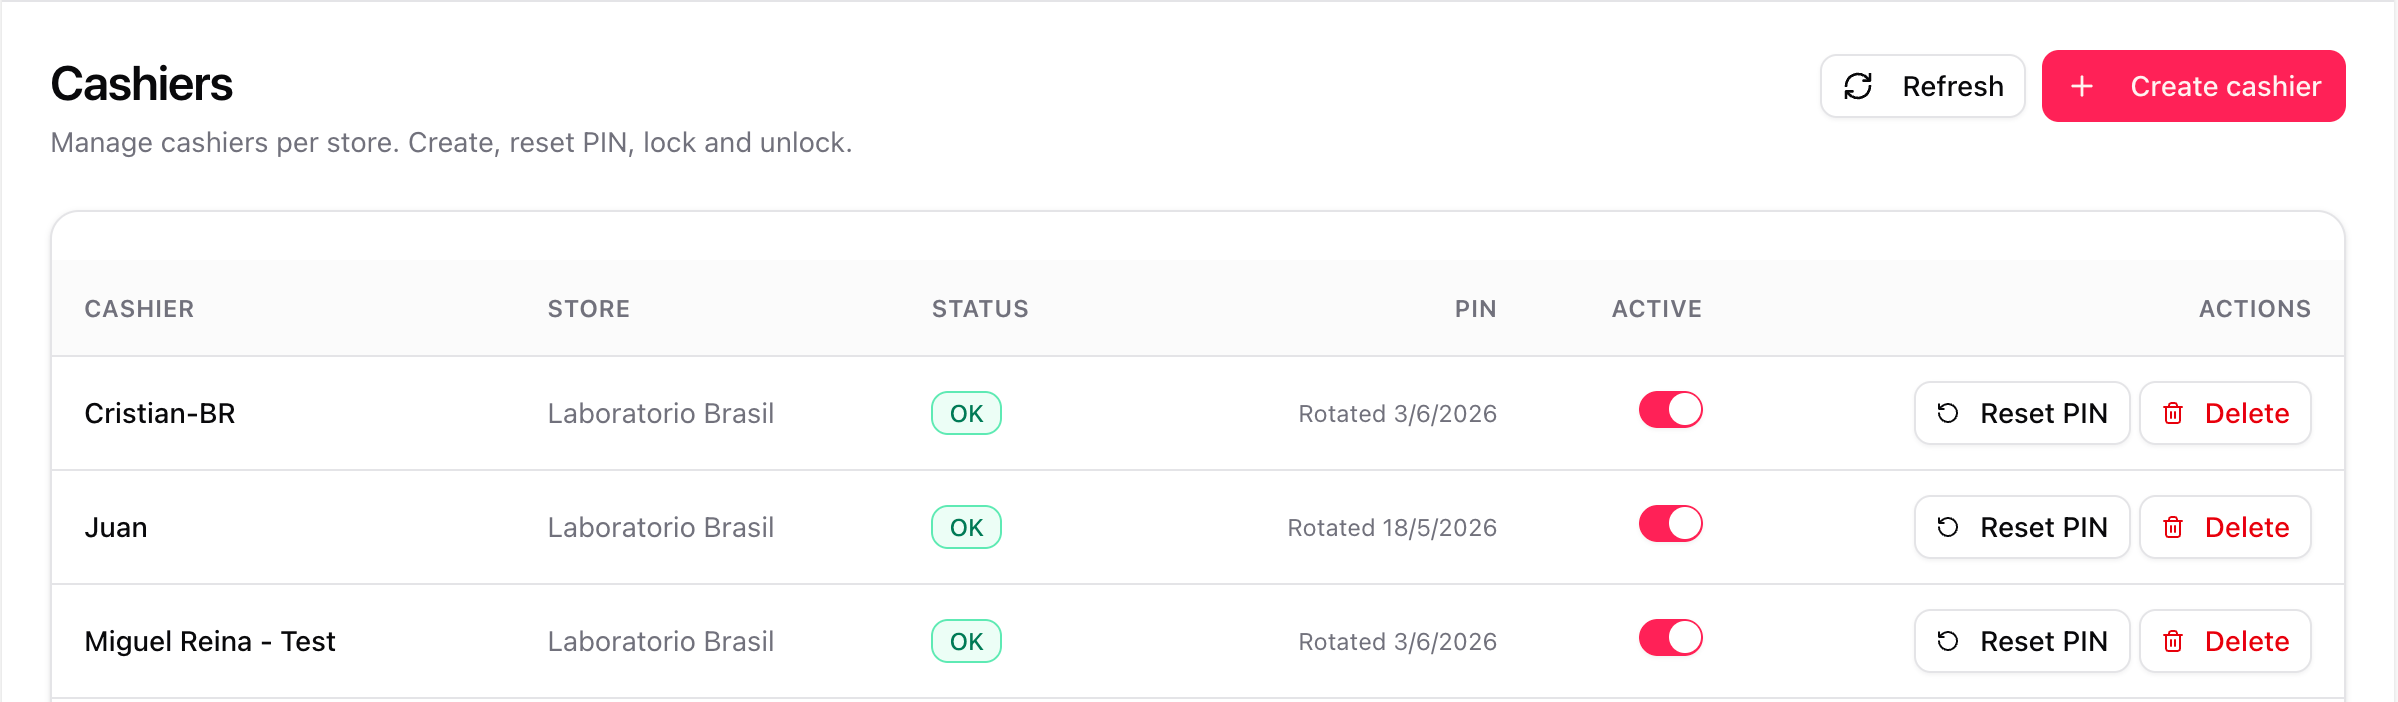
In the side menu, select Fire POS and open POS → Cashiers. This page lists the cashiers available for the selected store. From here you can create cashiers, edit their data, reset their PIN and unlock blocked cashiers.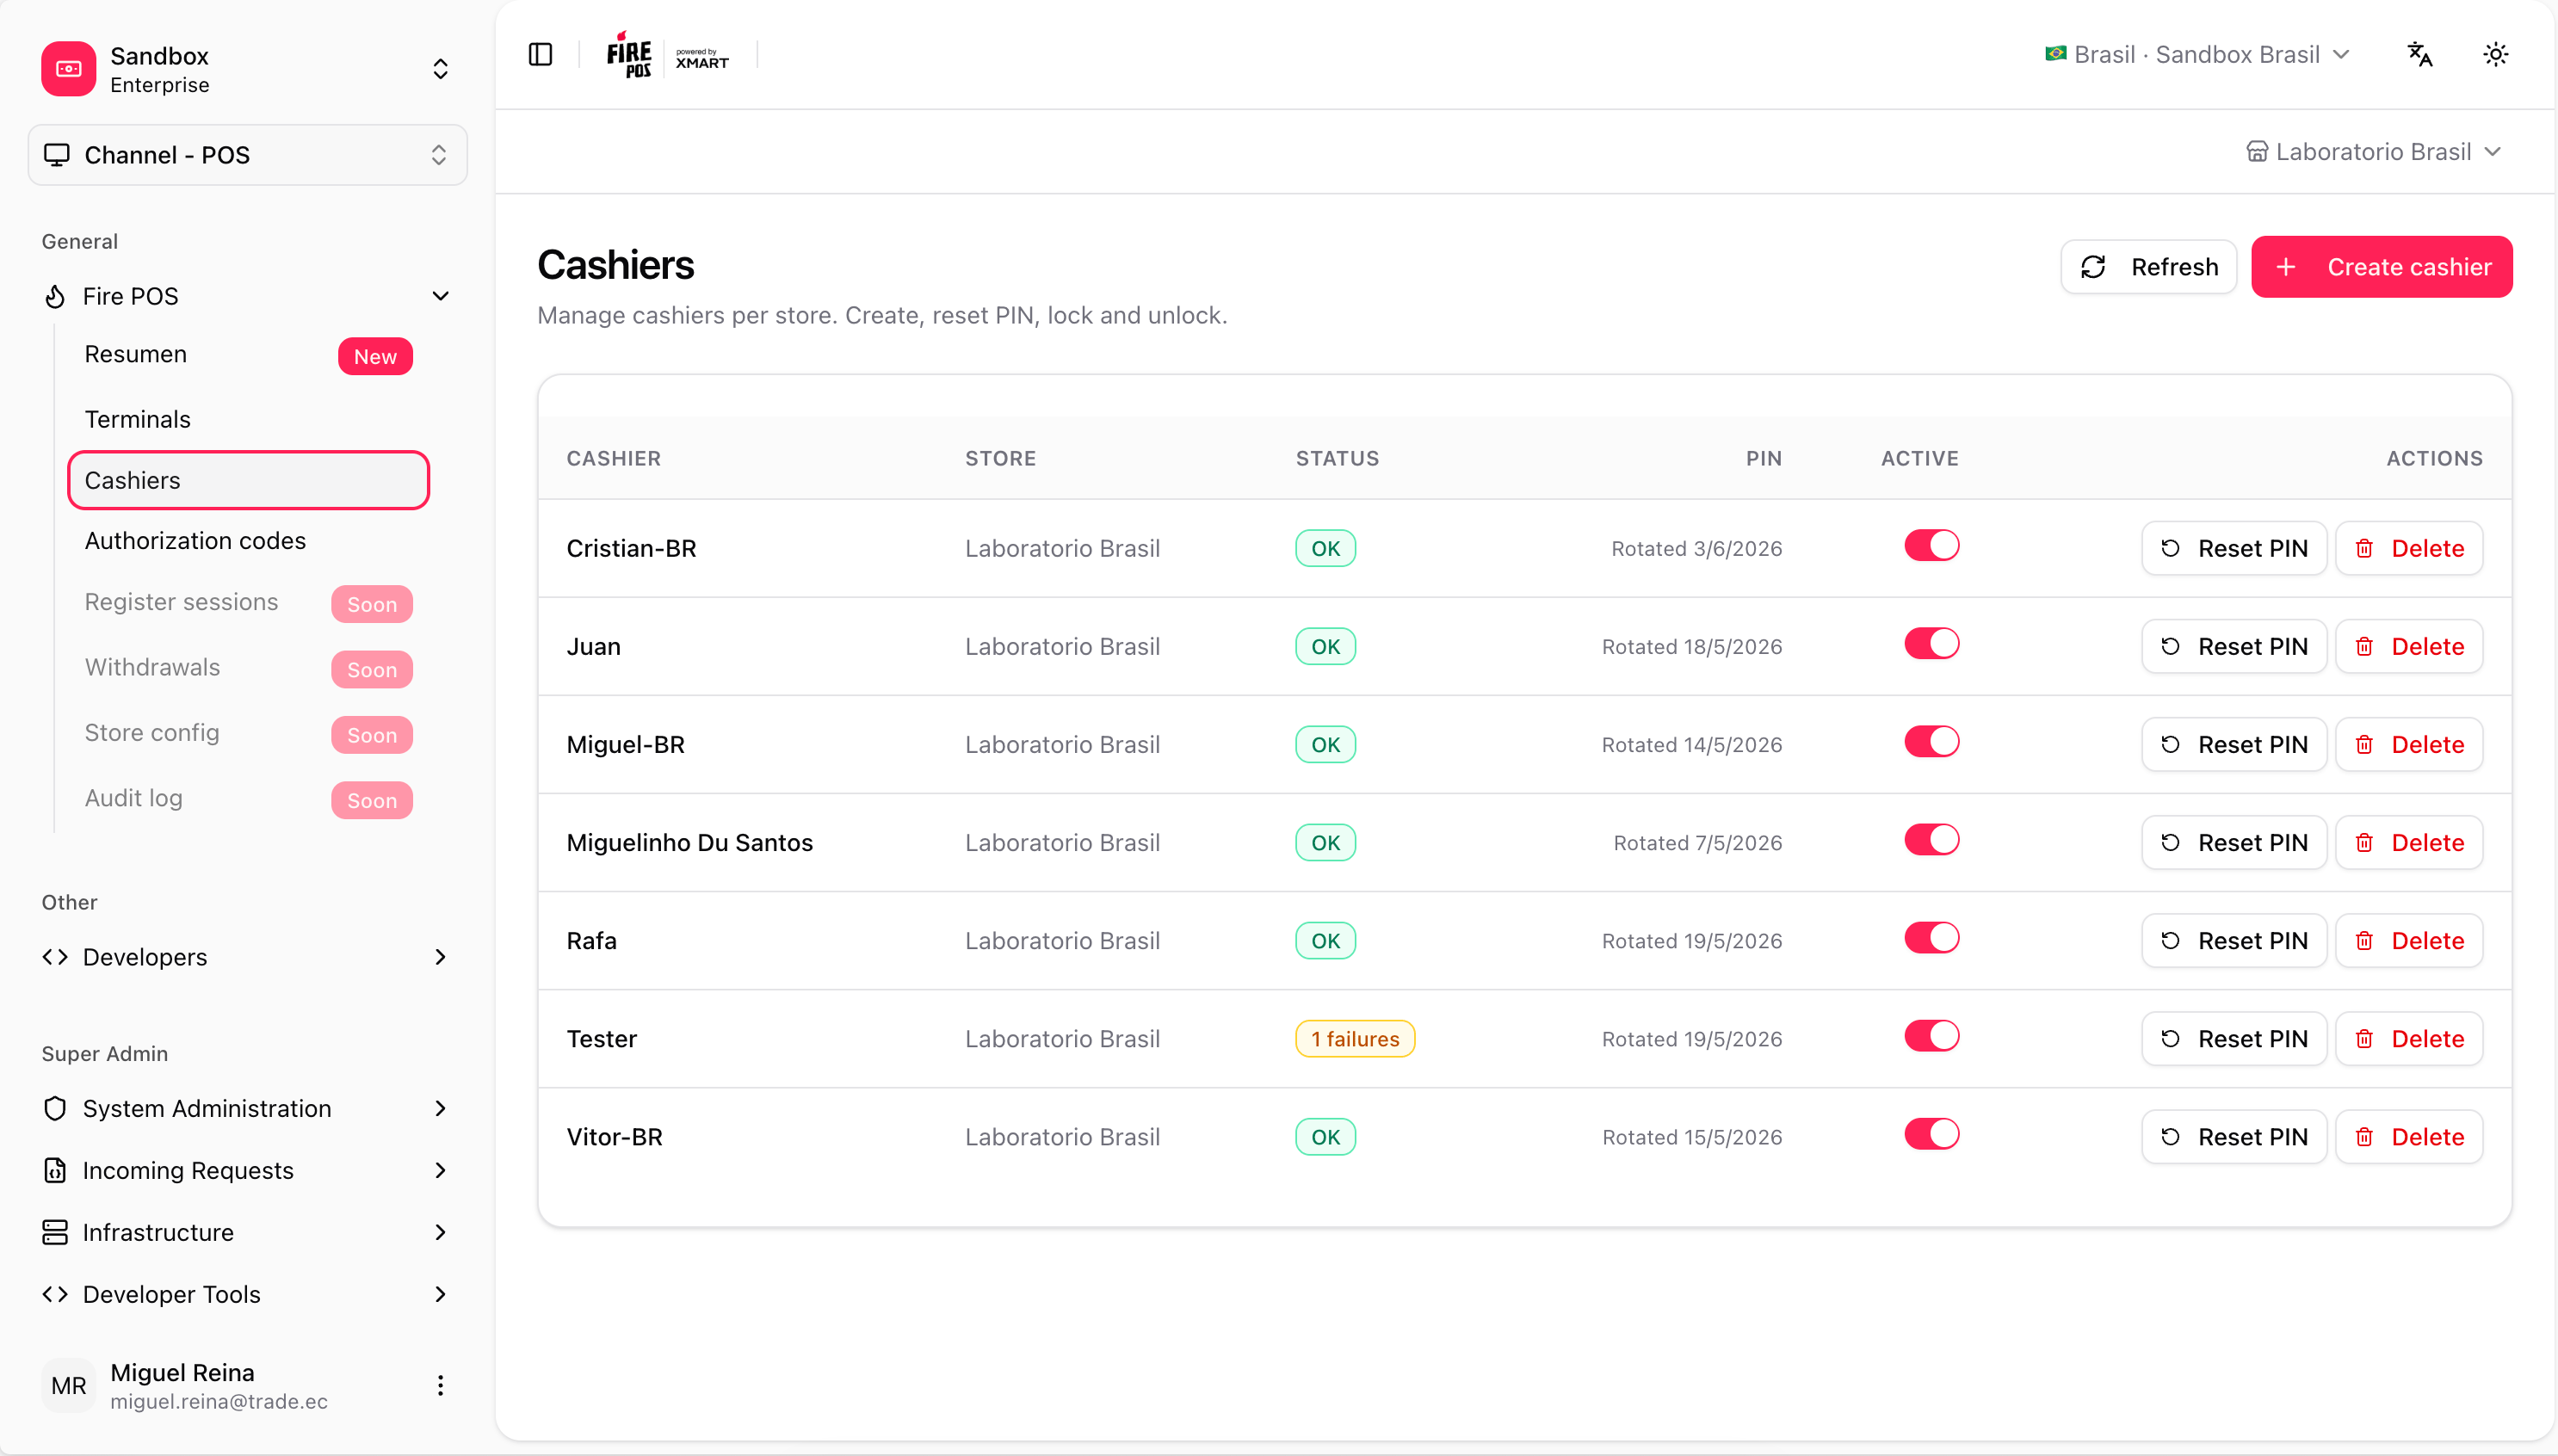
2. Create the cashier
Click Create cashier and complete the required fields.
- Name: the name shown on the POS login screen and in audit records.
- PIN: a 6-digit PIN used by the cashier to start a shift and confirm sensitive actions. Leave it blank to have the backoffice generate a secure PIN automatically — the recommended option.
- Status: keep the cashier active only while they are allowed to operate the POS.
Choose a non-obvious PIN. Do not use consecutive number sequences (
123456, 654321), repeated digits (111111) or birth dates. The safest option is to leave the PIN blank and use the auto-generated code. FIRE POS V2 validates cashier PINs server-side and may reject blacklisted values.3. Save and verify
Save the cashier. The backoffice persists the cashier and the PIN hash. The POS never receives the PIN itself. When the cashier is created, the backoffice shows the generated PIN once. Copy it or write it down before closing the dialog — it is not shown again.
4. Refresh the POS terminal
On the terminal, go to the cashier sign-in screen. If the new cashier is not visible yet, tap the refresh icon () on the cashier selector or restart the app so the terminal fetches a fresh snapshot. The new cashier should appear in Select a cashier.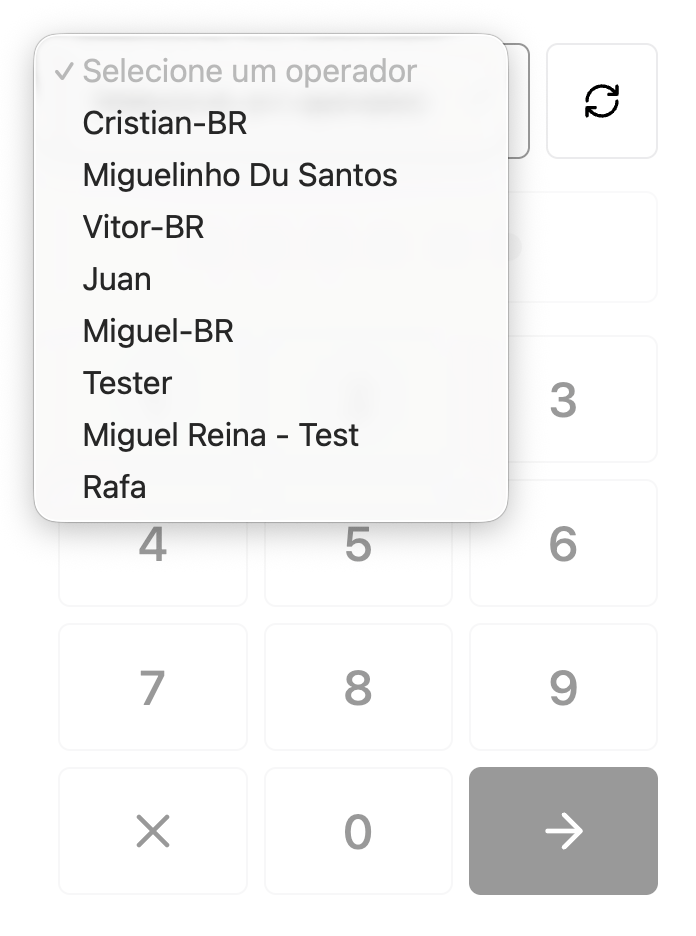
5. Sign in with the PIN
At the POS terminal:- Select the cashier name.
- Enter the 6-digit PIN.
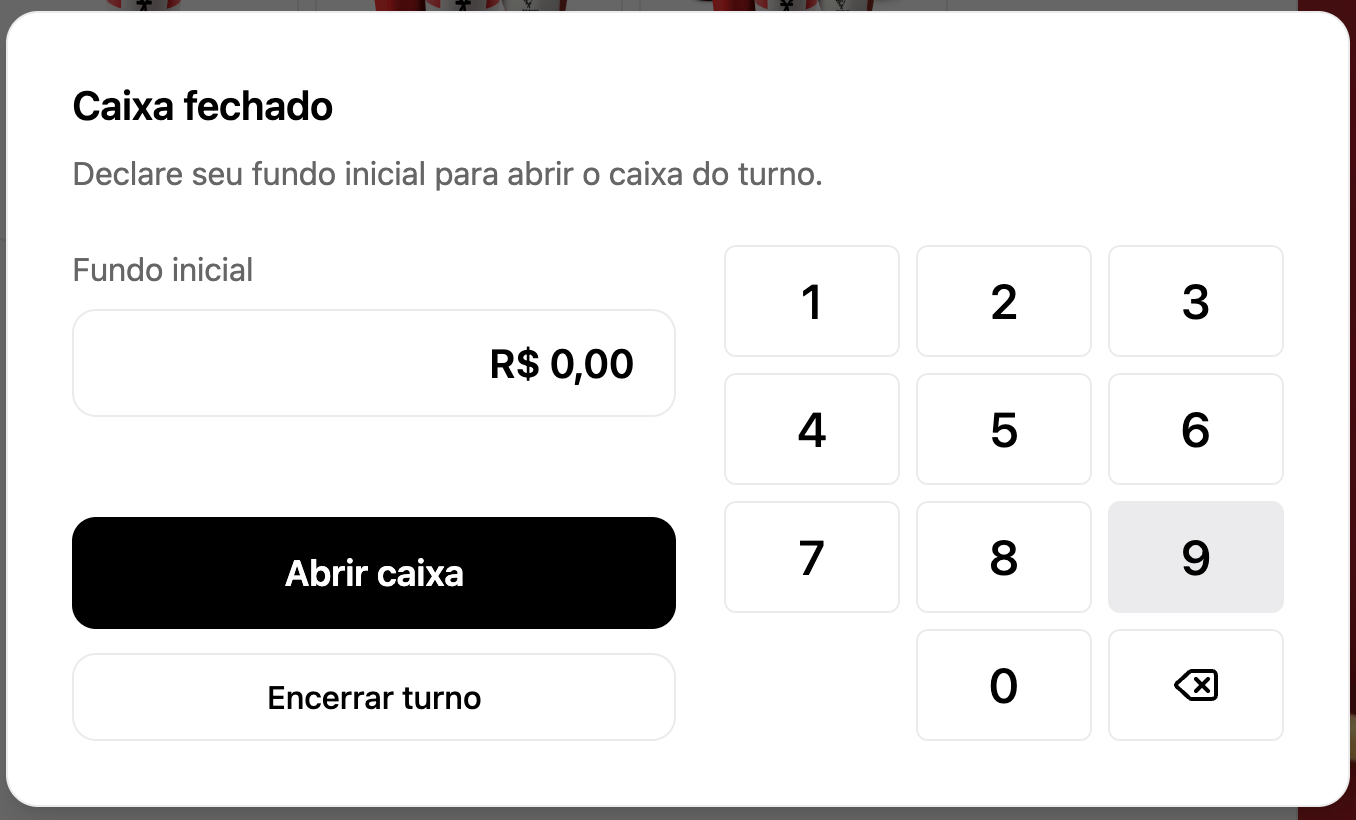
- Wait for the POS to start the shift.
PIN failures and lockout
If the cashier enters the wrong PIN too many times, the cashier is temporarily locked. The default FIRE POS V2 policy is 3 failed attempts followed by a 5-minute lockout. The cashier can wait until the lock expires, or a manager can unlock the cashier from POS → Cashiers in the backoffice.What happens in the POS
The terminal reads active cashiers from the store snapshot. During login, the POS sends the selected cashier and PIN to the backend. The backend validates the PIN and starts a shift. The POS also uses the cashier identity for:- Register opening and closing.
- Cash withdrawals.
- Authorization-code flows.
- Digital vouchers and audit logs.
- Cashier preferences, when configured.
Managing existing cashiers
Use POS → Cashiers to:- Edit a cashier name or status.
- Deactivate a cashier who no longer works at the store.
- Reset a forgotten PIN.
- Unlock a cashier blocked by failed PIN attempts.