

Fiscal Categories
A fiscal category identifies a product for tax purposes. Every product must belong to exactly one fiscal category.Viewing the list
Click the Fiscal categories tab to see all categories for the selected account.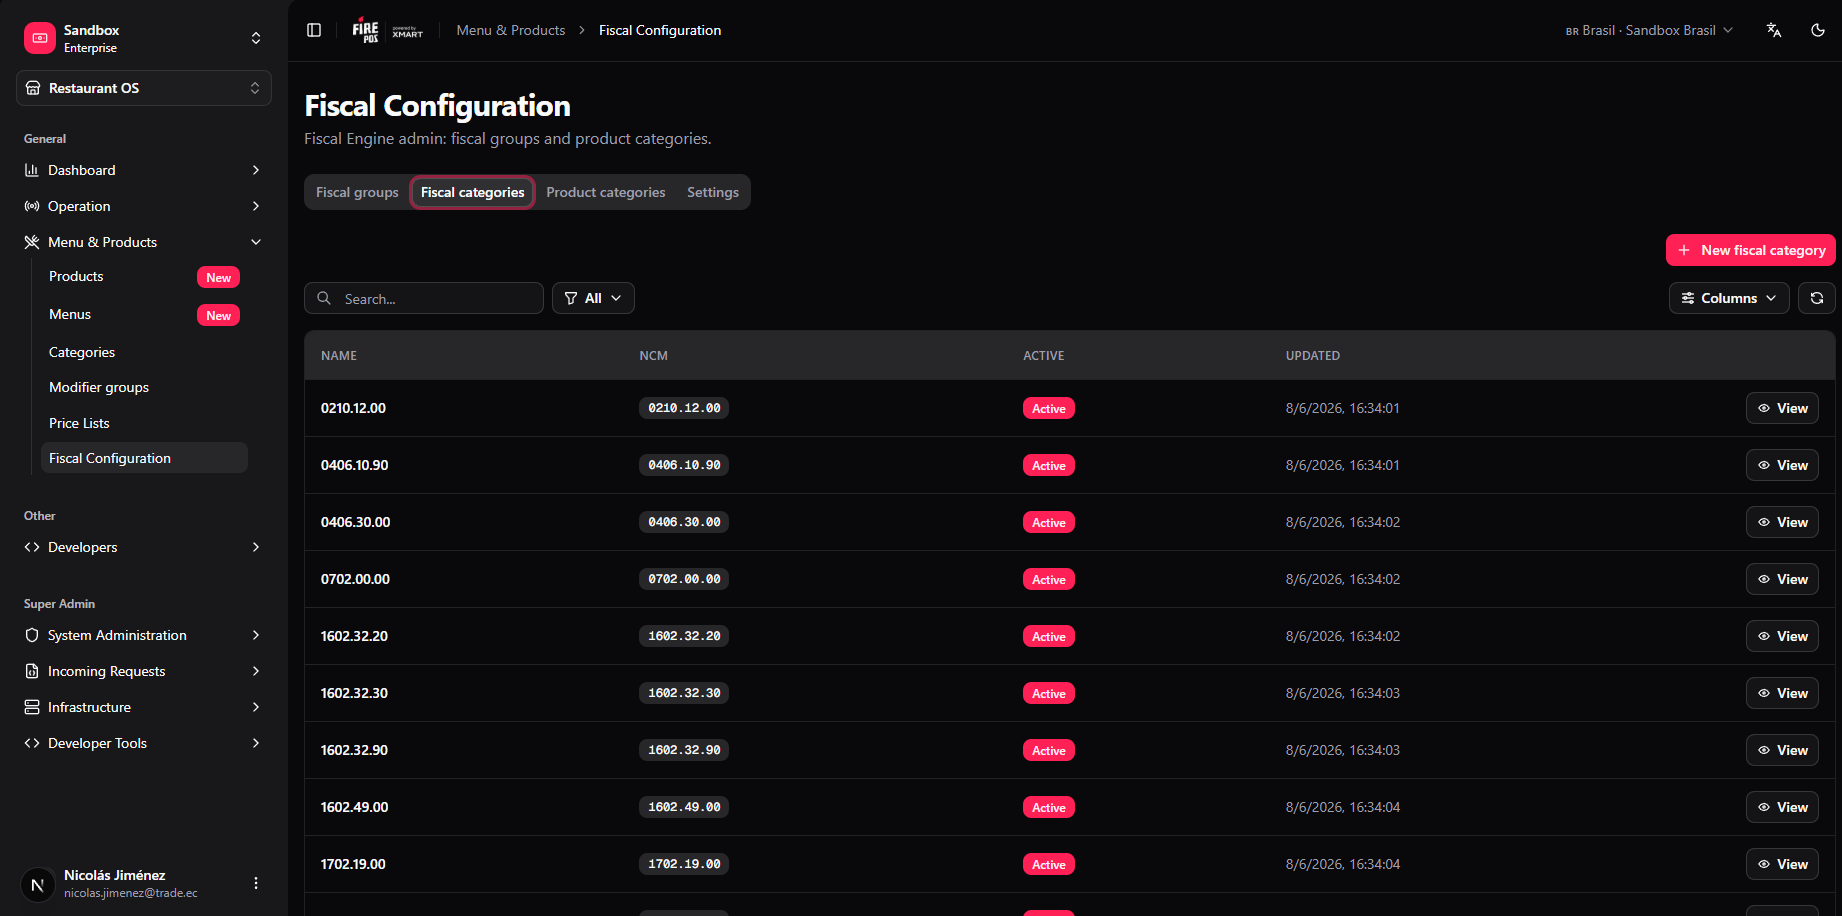
- Name — internal label used in the backoffice and in the tax matrix.
- NCM — the 8-digit Nomenclatura Comum do Mercosul code required on fiscal documents.
- Active — whether the category is available for product assignment.
- Updated — date and time of the last change.
Creating a fiscal category
- Click + New fiscal category (top right).
- The creation dialog opens.
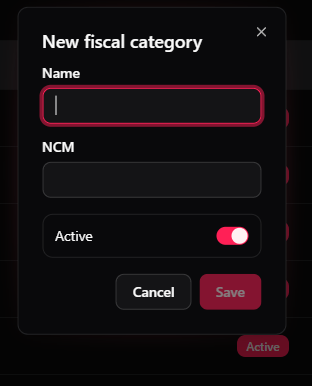
- Fill in the fields:
- Name — any label that clearly identifies the product type (e.g.
Processed meat 0210.12). - NCM — the 8-digit classification code. Enter digits only; dots are added automatically for display.
- Active — leave the toggle on so the category can be assigned immediately.
- Name — any label that clearly identifies the product type (e.g.
- Click Save.
The system pre-populates a default tax configuration for every new category. You will fill in the actual rates when you add the category to a fiscal group’s tax matrix.
Editing a fiscal category
Click View on any row to open the detail panel, then switch to the Edit tab. Modify Name, NCM, or the Active toggle and click Save.Deactivating a fiscal category
Open the edit tab and toggle Active off. The category disappears from assignment selectors but existing assignments are preserved.Fiscal Groups
A fiscal group defines how one or more stores invoice orders. It holds the tax regime, the UF (Brazilian state), the list of linked stores, and the tax matrix that maps each fiscal category to the applicable tax codes and rates.Viewing the list
Click the Fiscal groups tab.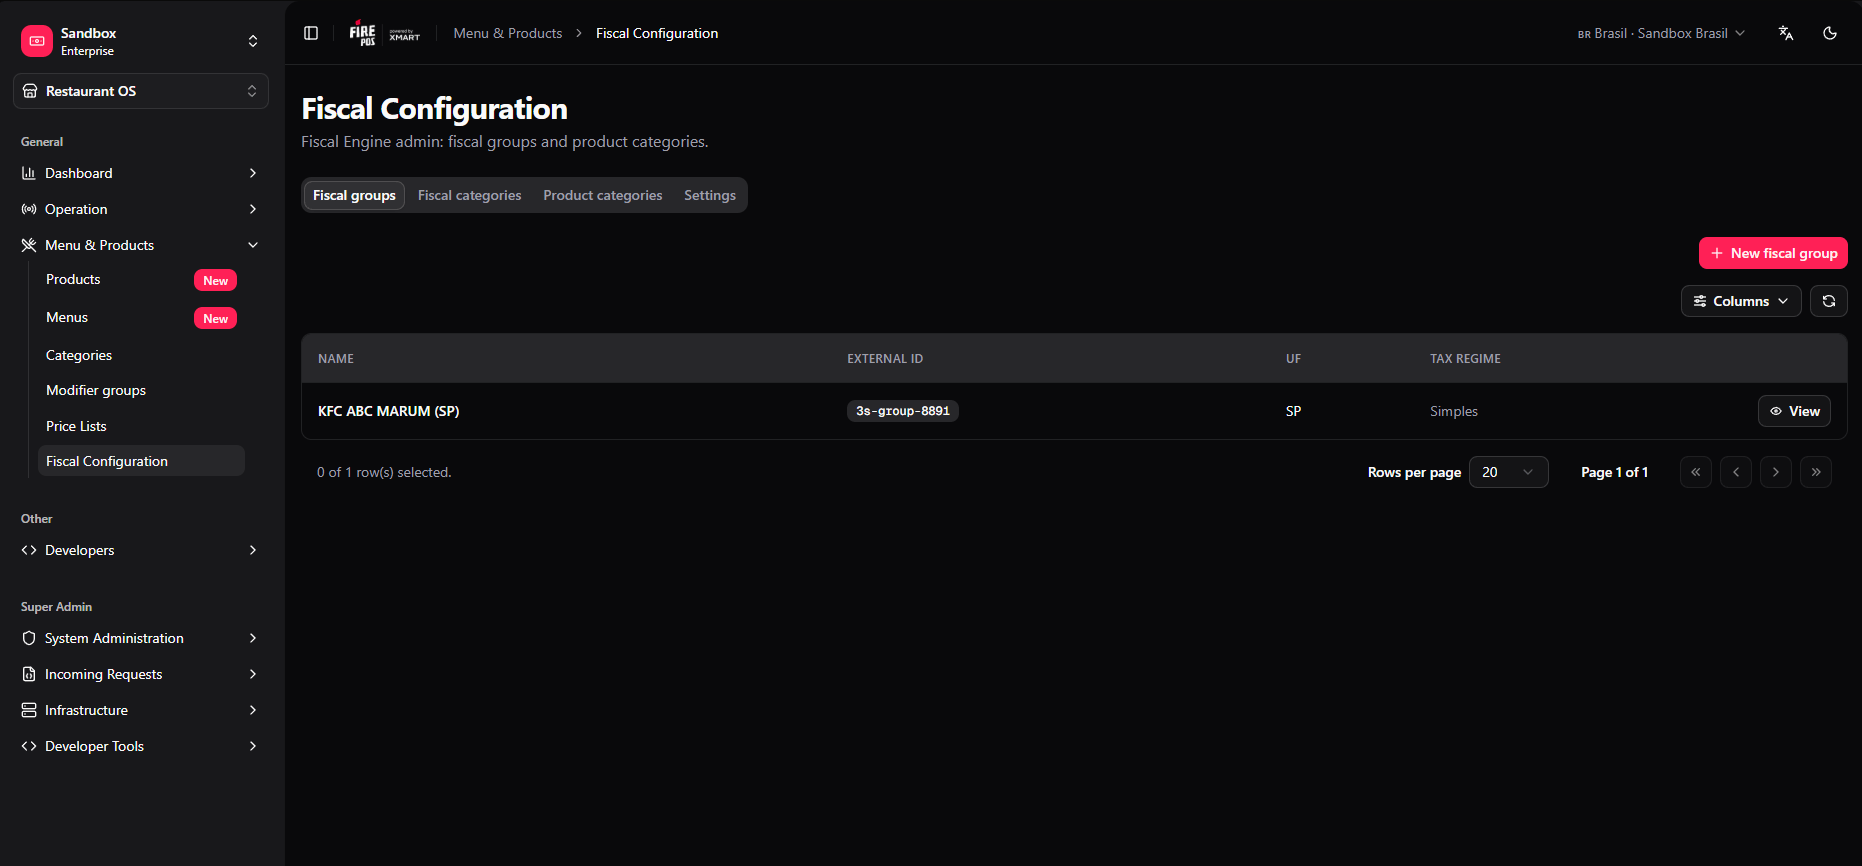
Viewing a group’s details
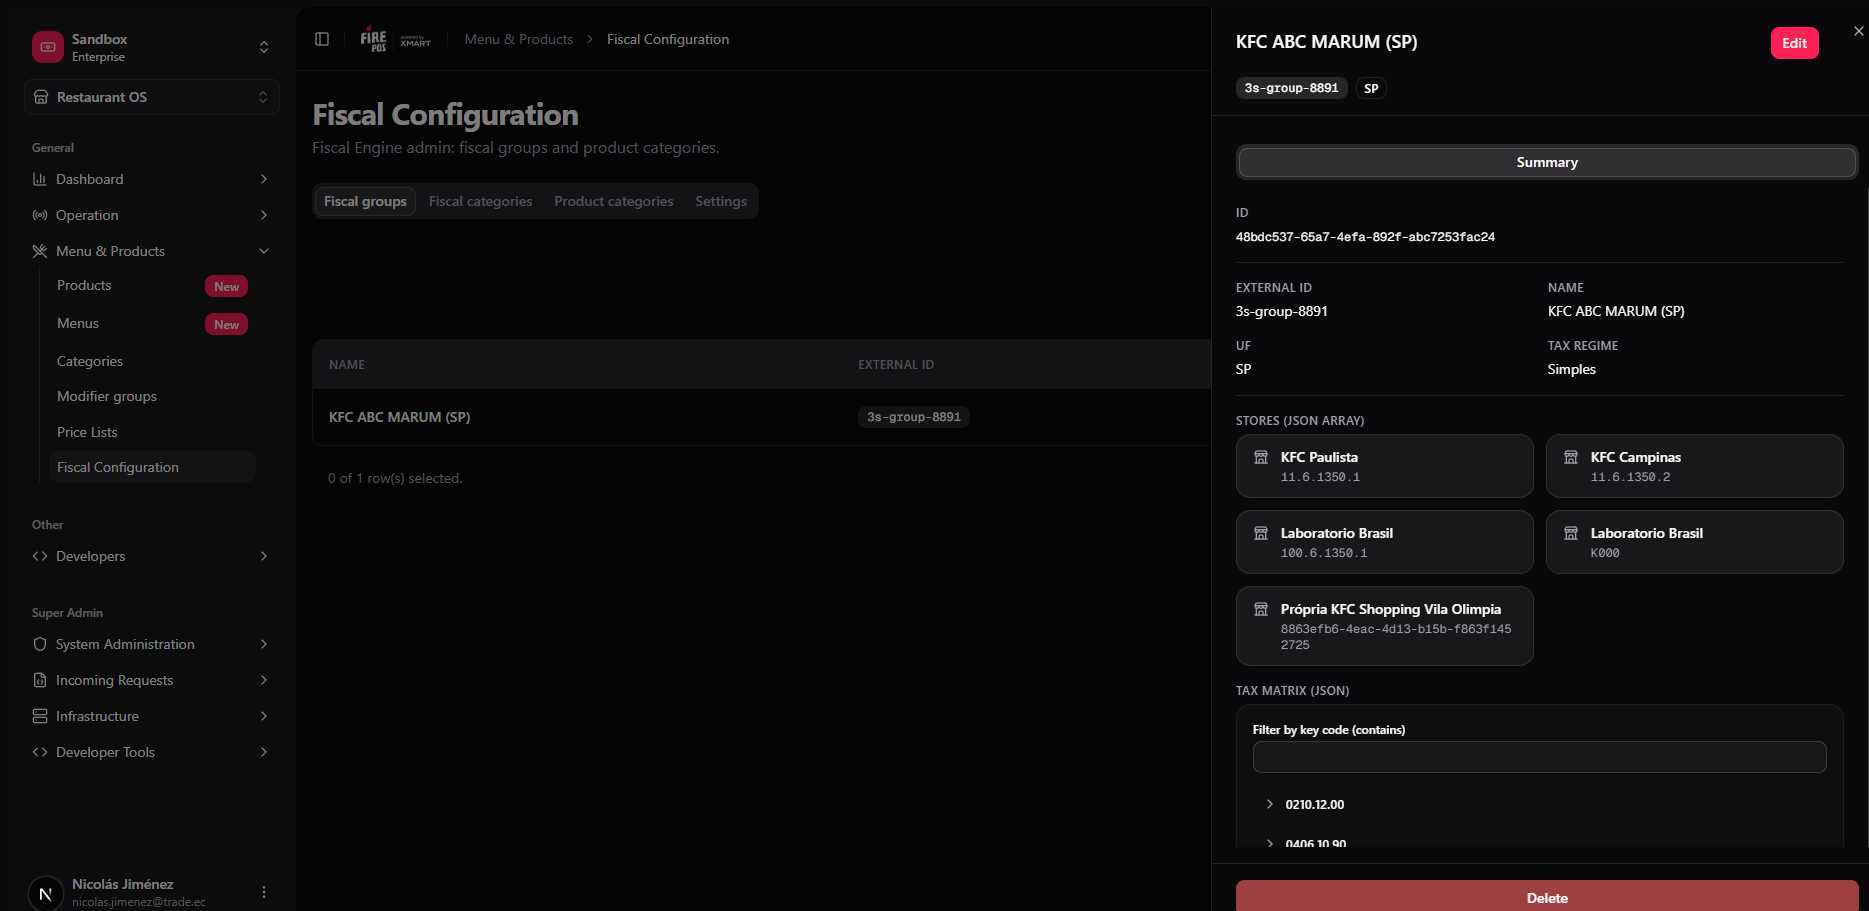
- ID — internal UUID.
- External ID — the identifier used by the fiscal engine.
- Name, UF, Tax regime — the group’s basic configuration.
- Stores — the stores linked to this group, shown as cards with their ID and name.
- Tax matrix — the list of fiscal categories and their tax configurations. Click any category row to expand it and see the individual rates.
Creating a fiscal group
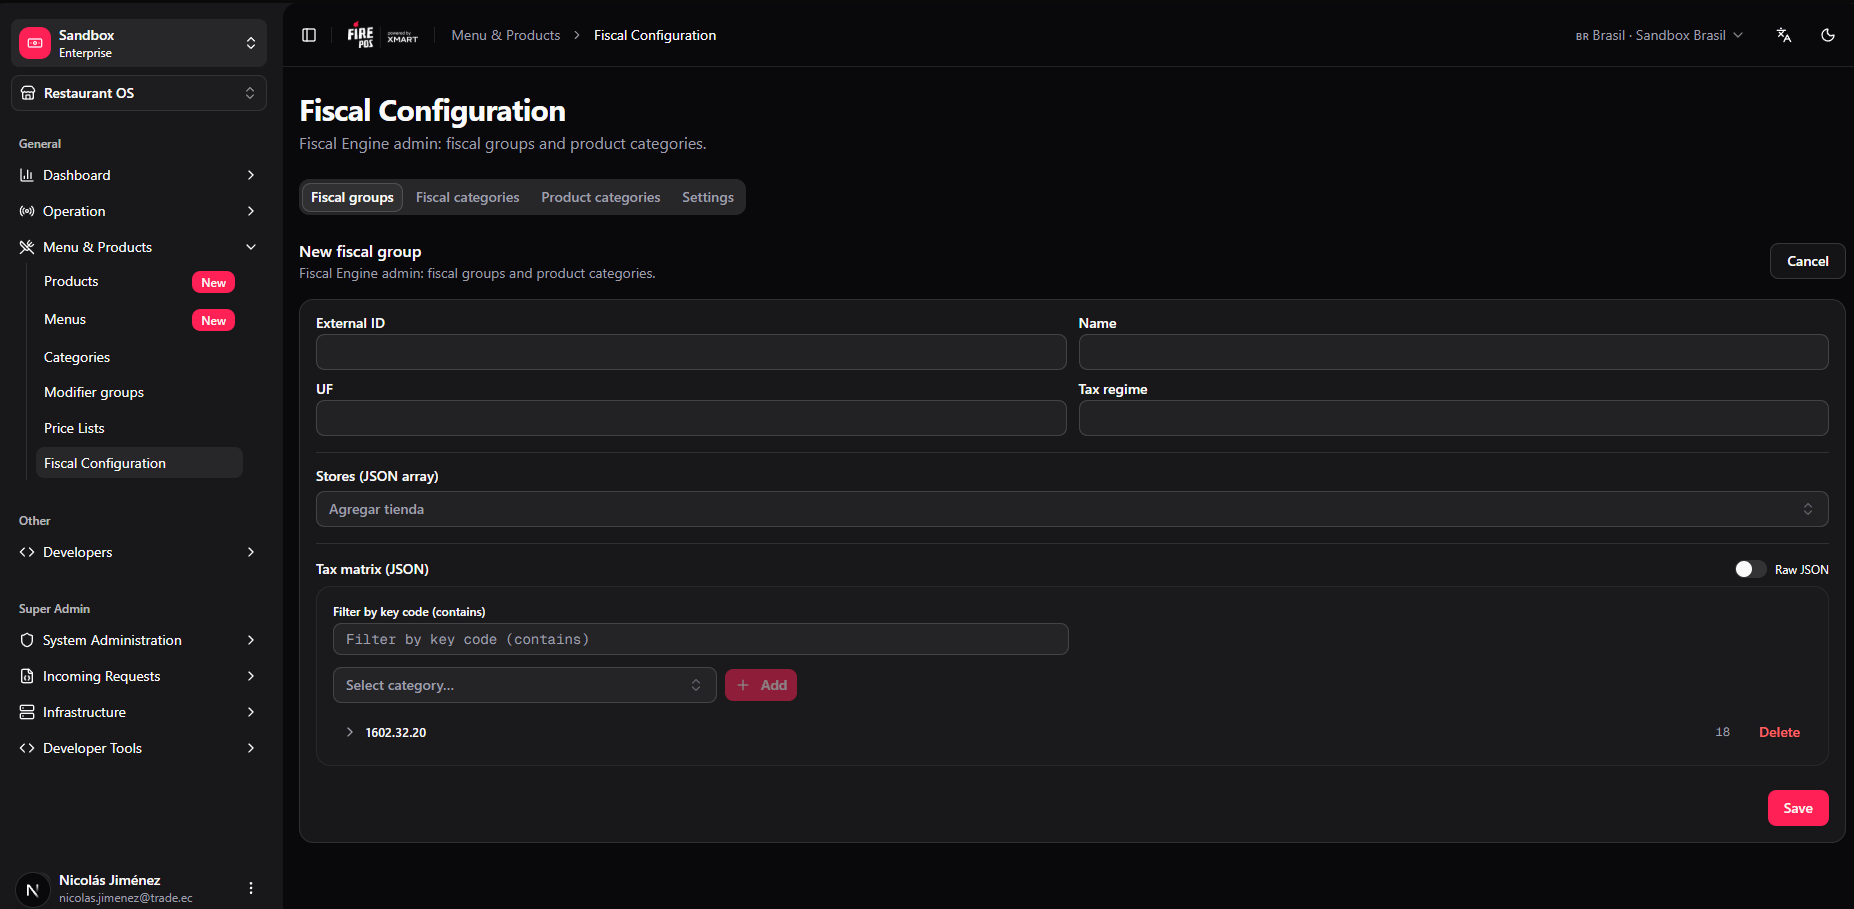
- Click + New fiscal group (top right of the list).
- The creation form opens.
-
Fill in the header fields:
- External ID — the identifier the fiscal engine uses to match this group. Set it once; it cannot be changed after creation.
- Name — a readable label (e.g.
KFC ABC MARUM (SP)). - UF — the two-letter Brazilian state code where documents will be issued (e.g.
SP). - Tax regime — the applicable tax regime (e.g.
Simples,Lucro Presumido).
-
In the Stores section, use the Add store dropdown to search and select every store that must use this group. Each added store shows its ID (
vendor.store_number) and name. Click × to remove one. - Build the Tax matrix (see below).
- Click Save.
Editing a fiscal group
Click View on a group then Edit, or navigate directly. The edit form is identical to the creation form except External ID is locked.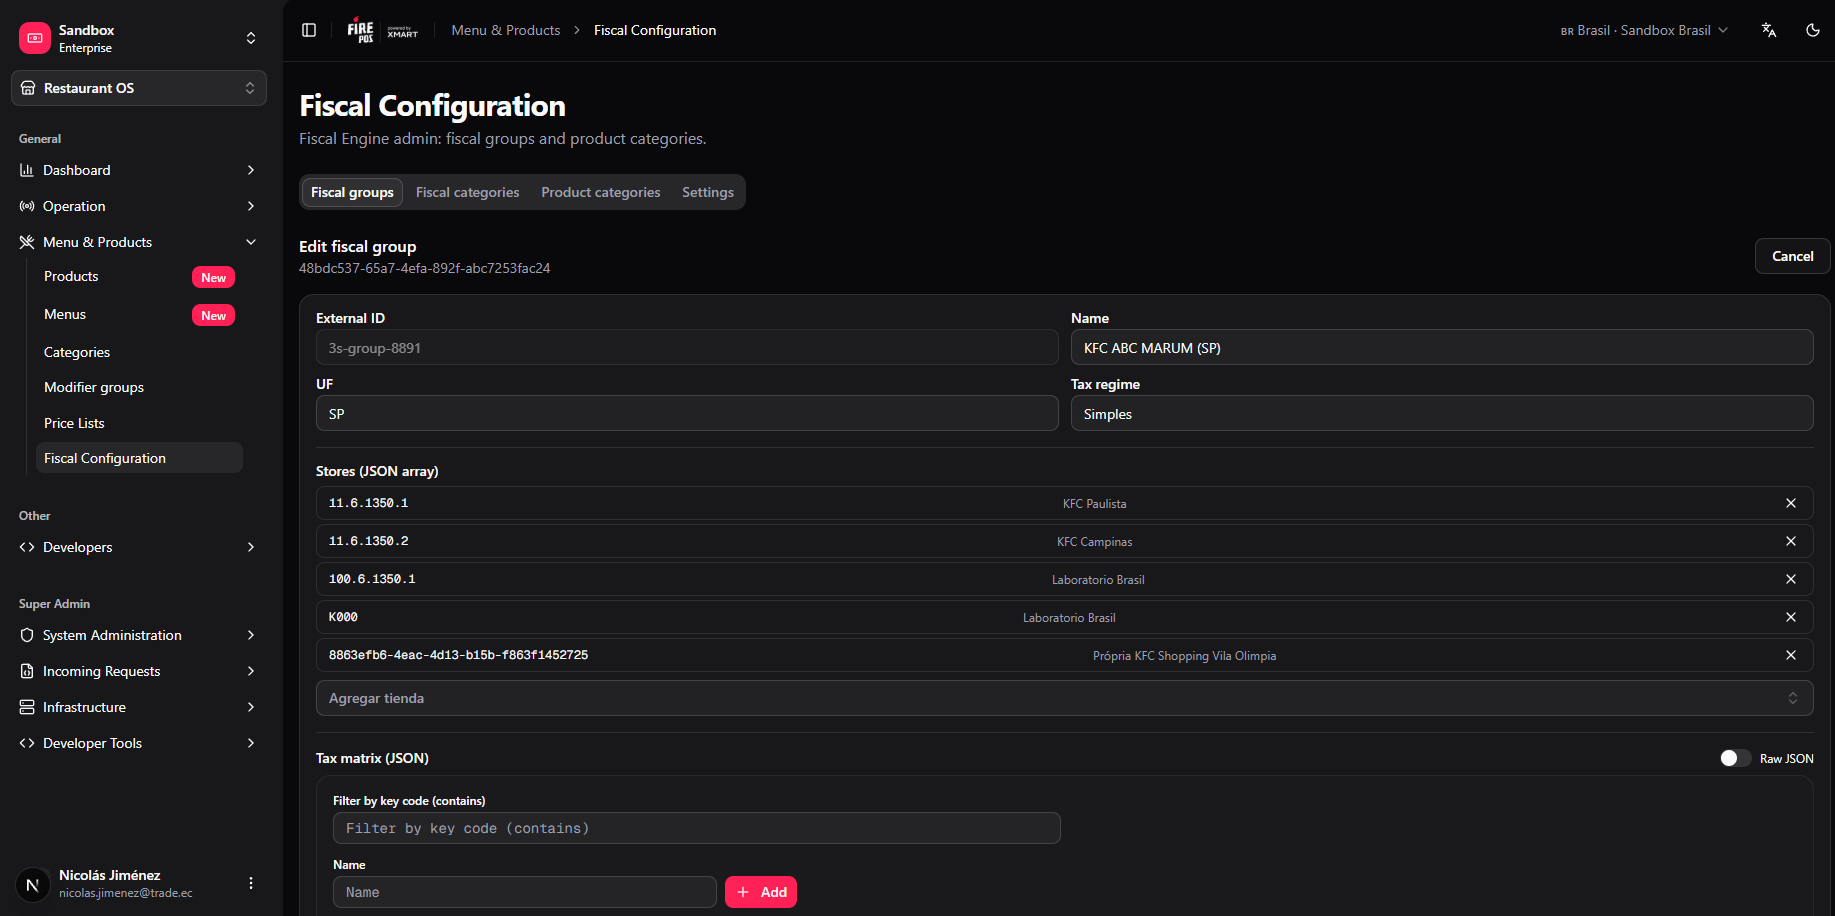
Deleting a fiscal group
Open the group detail panel and click Delete at the bottom. Confirm the action. Stores previously linked to the group are left with no fiscal configuration; fiscal document issuance will fail until they are assigned to another group.Tax Matrix
The tax matrix is the core of a fiscal group. It maps each fiscal category to the tax codes and rates that apply to orders issued by the group’s stores.Adding a category to the matrix
- In the group form (create or edit), scroll to Tax matrix (JSON).
- Use the Select category… dropdown to find the fiscal category.
- Click + Add.
0. Expand the row and fill in the fields according to the applicable legislation.
Matrix fields
Filtering the matrix
Use the Filter by key code (contains) field to search for a specific category inside a large matrix.Removing a category from the matrix
Click Delete on the category row. The entry is removed from this group only; the fiscal category itself is not affected.Common workflows
Adding a new product type in a new state
- Check whether a fiscal category with the correct NCM already exists. If not, create one in the Fiscal categories tab.
- Check whether a fiscal group for the target UF and tax regime already exists. If not, create one and link the relevant stores.
- Add the fiscal category to the group’s tax matrix and fill in the correct rates.
- Assign the fiscal category to the products in Catalog → Products.
Moving a store to a different fiscal group
- Open the current fiscal group and click × next to the store in the Stores list. Save.
- Open the new fiscal group and add the store. Save.
- The store will use the new group’s tax matrix on its next fiscal document.
Correcting a wrong NCM
- Open the fiscal category and update the NCM field. Save.
- Open every fiscal group that includes this category, expand its matrix entry, and verify the
NCMfield. Update if needed. Save each group.