

Values combine from general to specific: General (method) → Brand → Store → Device. The most specific level wins per key; whatever a level doesn’t define is inherited from the one above.
Prerequisites
- Backoffice access at app.fire.rest, with permissions on the account.
- Country, account, and brand selected in the context switcher.
1. Open the Configuration tab
Go to PayBridge → Payment methods, open a method, and go to the Configuration tab. The screen is a master-detail: the level tree on the left, the selected level’s configuration object on the right.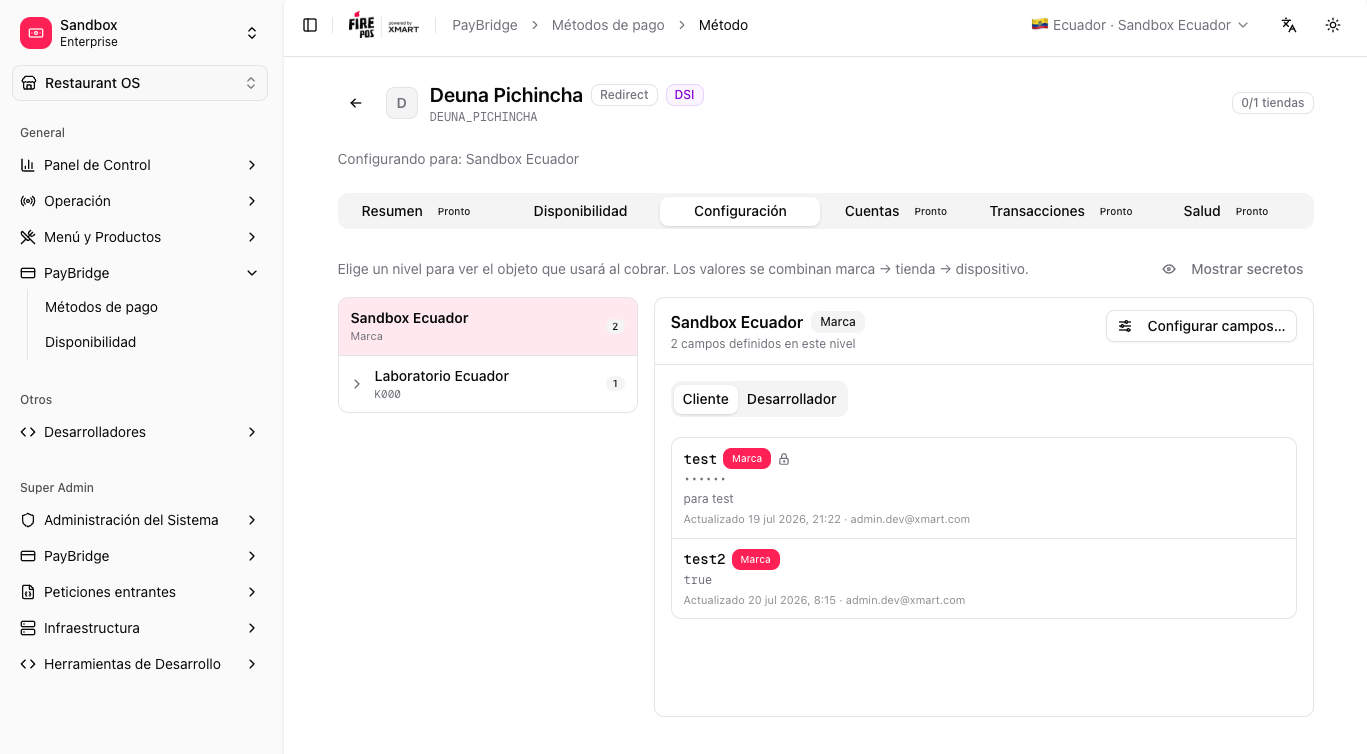
2. Pick a level
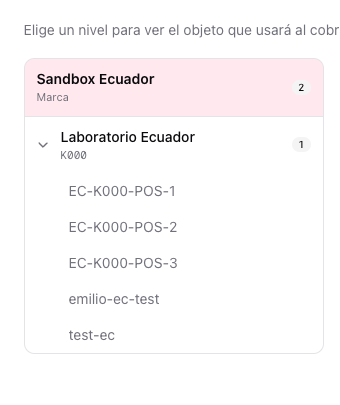
In the tree on the left, select the level you want to view or edit:- Brand — applies to all of the brand’s stores.
- Store — expand the brand to see its stores.
- Device — expand a store to see its POS terminals and kiosks.
3. Read the effective object
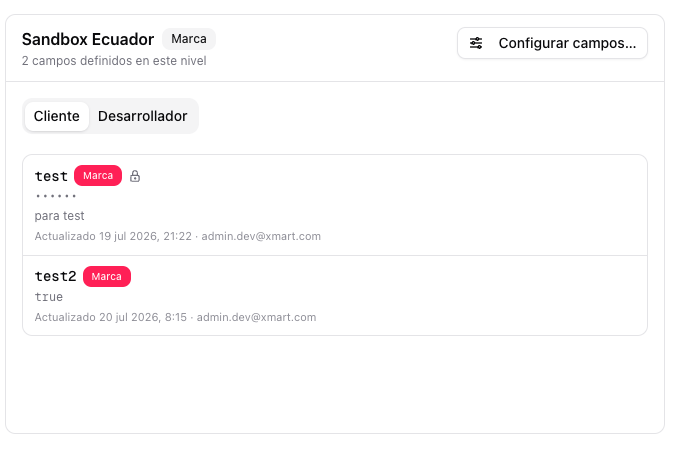
On the right you see the selected level’s effective object: its own fields plus those inherited from higher levels. There are two views:- Client — a readable list: each field shows which level it comes from and, if it overrides a higher level, flags it.
- Developer — the JSON object as-is, ready for the runtime.
4. Add or edit fields
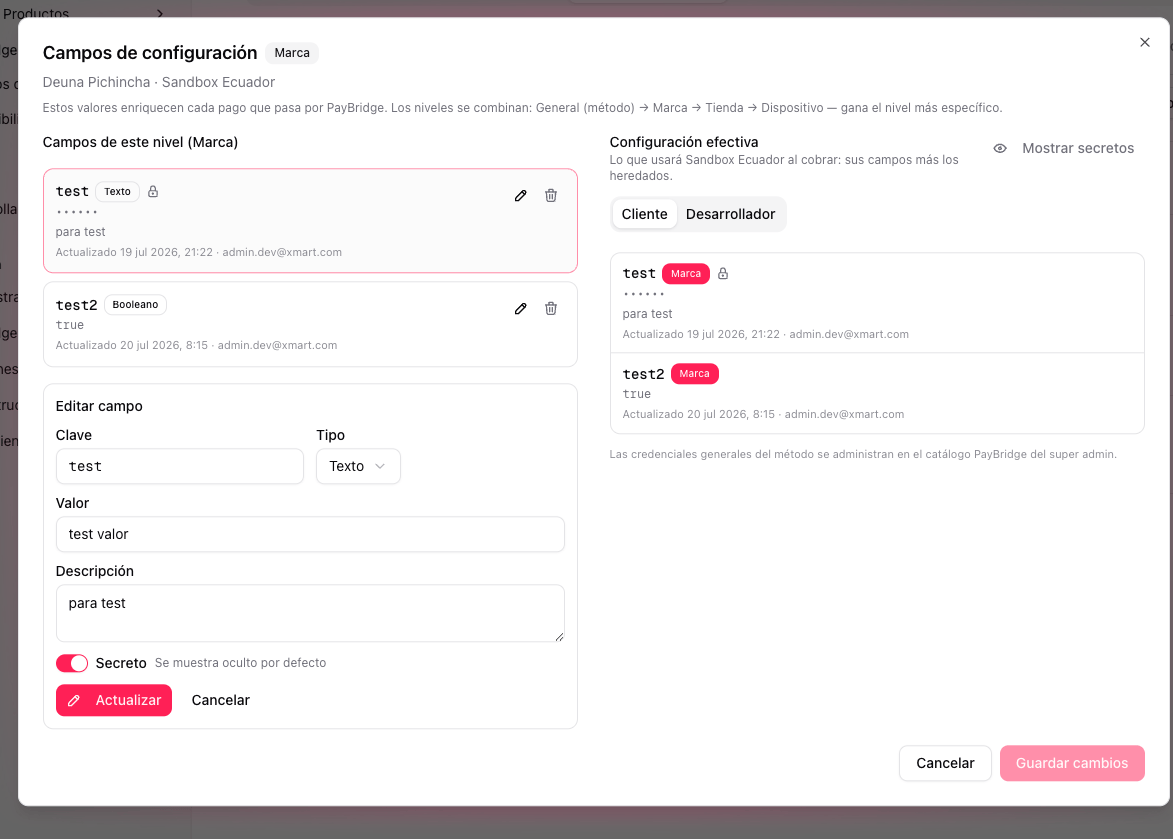
Click Configure fields… to open the level’s editor. For each field you define:- Key — the identifier (for example
merchant_id). - Type — Text, Number, Boolean, or JSON.
- Value — the field’s content.
- Description (optional) — what the field is for.
- Secret — whether the value should be shown masked (credentials).
5. Save
Click Save changes. The system records the date and the user who updated each modified field. The level’s values are reflected immediately in the effective object.
How this configuration is used
PayBridge and DSI work across two separate planes:- Configuration plane. Fire is the source of truth and syncs this configuration to DSI ahead of time: when you change a field, method, or channel, Fire updates the merchant’s configuration on DSI (enabled methods, branches, terminals, and credentials). This way DSI already knows the merchant before any charge.
- Transaction plane. When a payment is made, since DSI already has the configuration, the payload Fire sends is lean (order, amount, method, reference). There’s no need to enrich the request with these fields on every payment.
The effective object you see on the right is exactly what gets synced for that scope (brand, store, or device).
Related
Method availability
Decide where the method is turned on and in which channels.
Supported methods by country
The methods PayBridge considers in each country.